Thank you for getting a Cog! We hope that you'll have a lot of fun with your new hexagonal friend. This page will give you a quick overview on how to get started with Cog, but if there's anything else you need, or if you have any feedback, please just get in touch at support@robotical.io
Cog Features
Cog has a whole bunch of built in sensors, as well as LED lights and a speaker
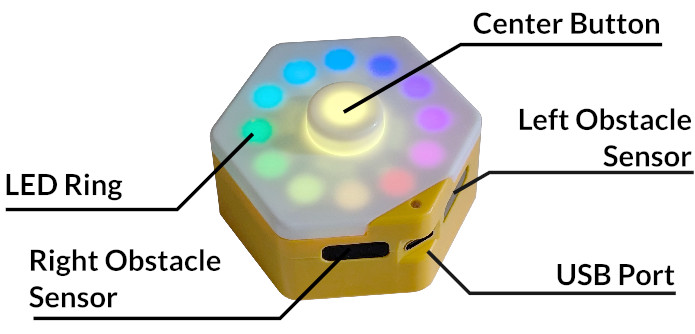
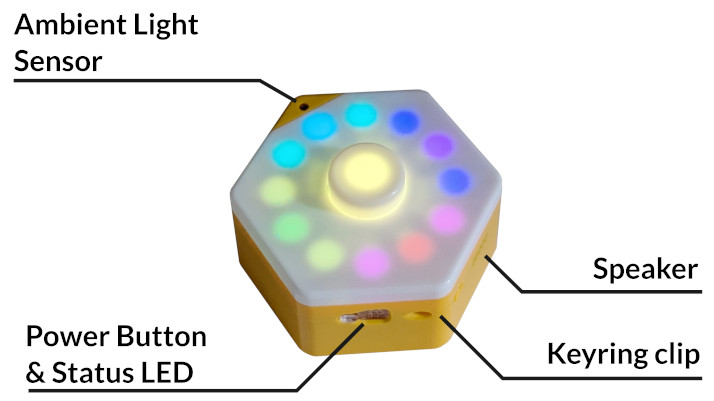
The acceleration, rotation and tilt sensor is inside and isn't shown here!
Powering Cog
You can power cog from two standard AA batteries, either alkaline or rechargable, or just using the USB port
Battery
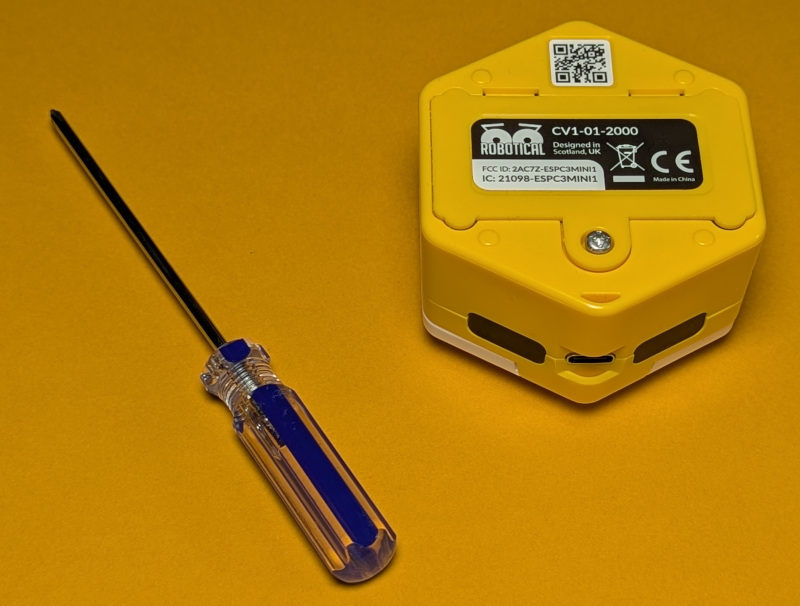
Using a screwdriver, unscrew the screw on the battery cover until the cover becomes loose. You don't need to remove the screw entirely
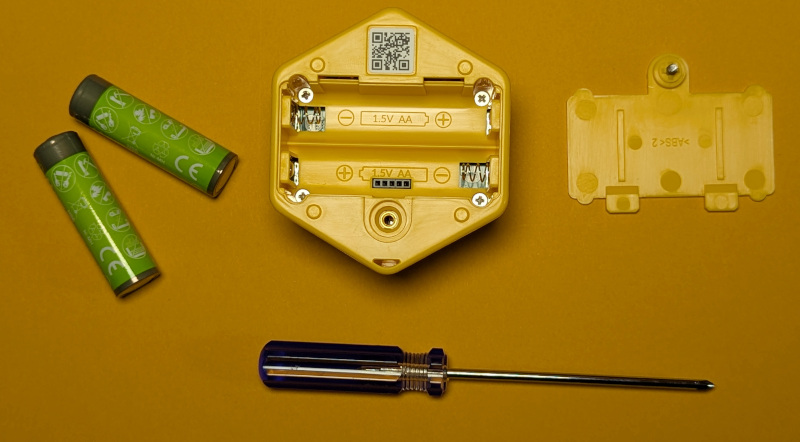
Lift off the cover, the screw will stay in place with the cover
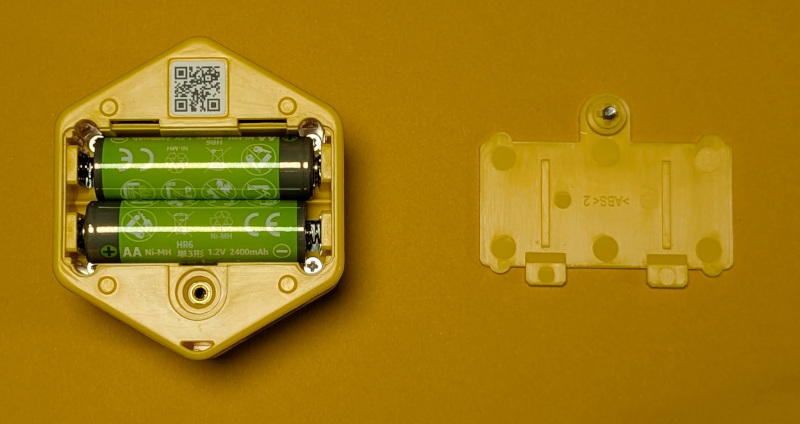
Put the batteries in, paying attention to the polarity markings. Then screw the cover back on and you're good to go!
USB
Alternatively, just connect a USB-C cable to power cog directly.

Power Button & Status LED
The power button is next to the status LED on the side of Cog
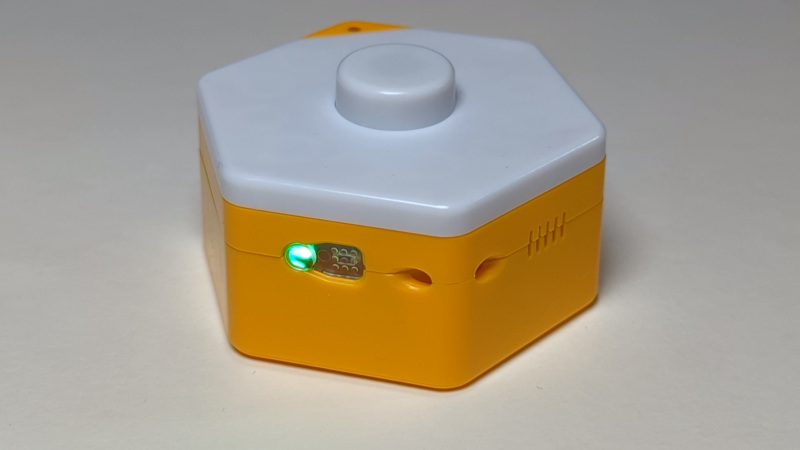
Here's what the status LED means:
- Off - Cog is off or powering down
- Flashing Green - on battery power, no bluetooth connection
- Flashing Blue - on battery power, bluetooth connection
- Flashing Orange - low battery
- Solid Green - on USB power
Turning Cog on
To turn cog on, just push the power button. The LED ring will light up for a few seconds
Turning Cog off
To turn cog off, just hold the power button for a couple of seconds. The status light will turn off It will take about 10 seconds before Cog can be turned back on again
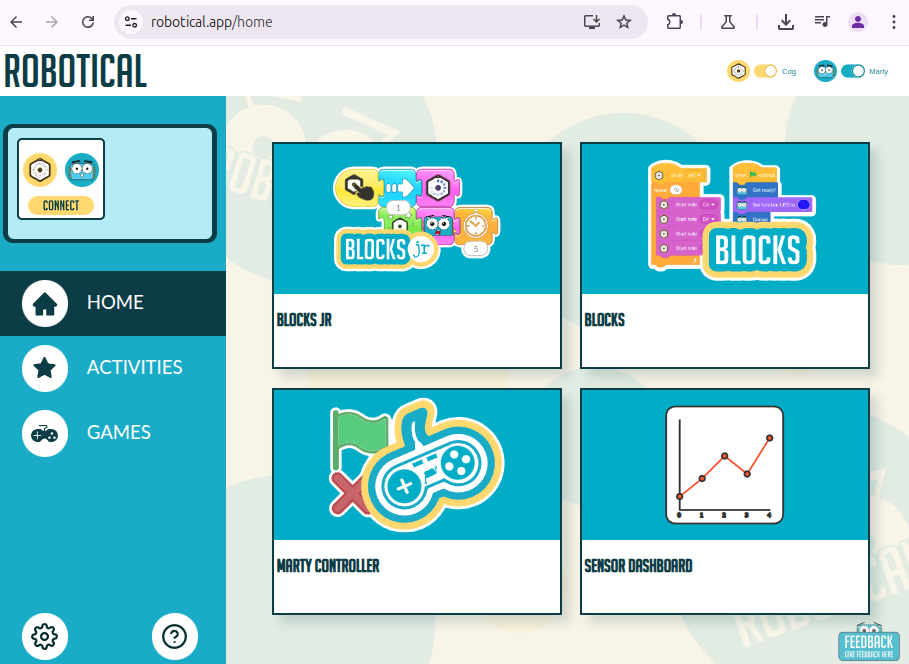
The Robotical App for Cog
Cog is compatible with most modern devices with Bluetooth 4 or higher. Our new “Robotical” app can be used to program both Cog and Marty, and is available in your browser, on iOS and on Android
Online App
Suitable for: Chromebooks, PCs with bluetooth, optionally Android
Just go to robotical.app to get started!
iOS App
Download the Robotical app from the App Store
You will need to allow location permissions in order for bluetooth connectivity to function
Android App
Download the Robotical app from the Play Store
You will need to allow location permissions in order for bluetooth connectivity to function
Connect to Cog
Don't forget to turn Cog on first!
Press the Connect button in the top left of the app to connect to Cog

QR code scan
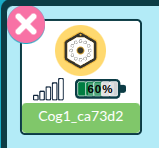
Every Cog has a QR code underneath it that can be scanned to select that Cog as the one you want to connect to
When you press connect the camera will start to let you scan the QR code
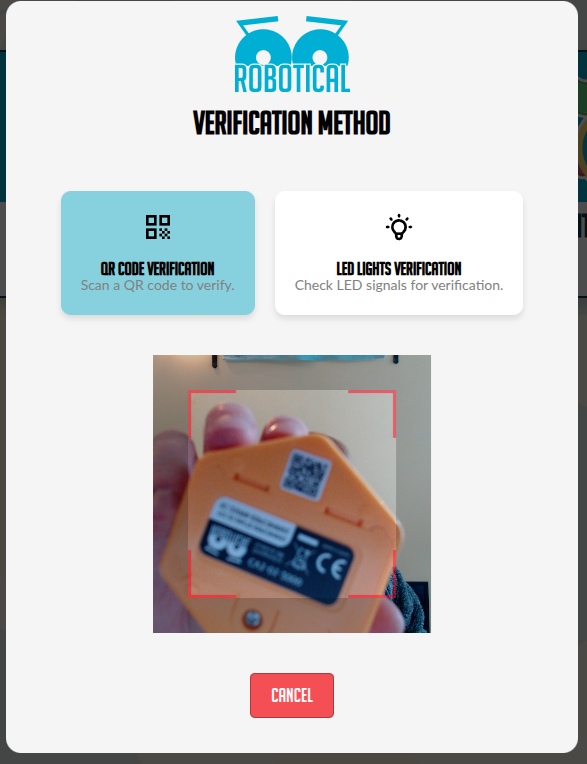
Once the code is scanned, you can click the green button to proceed
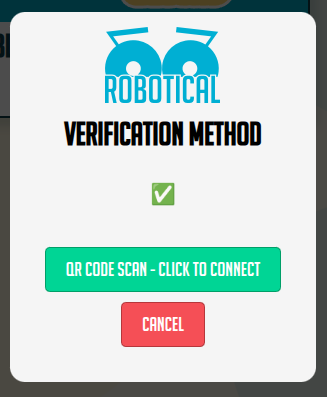
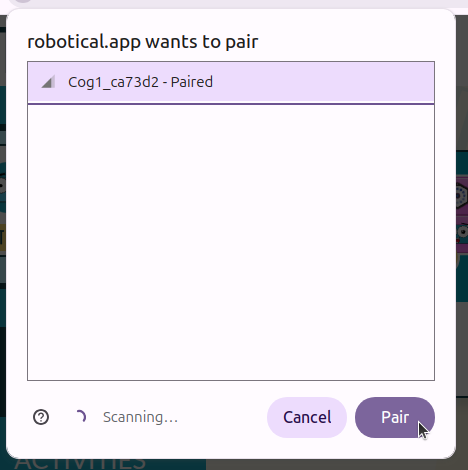
If you're using the web app, you'll then see a popup with a cog listed. Select it and press Pair
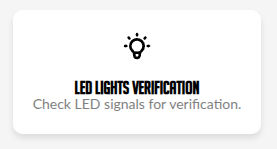
LED verification
Alternatively, if you prefer you can select the cog or Marty that you want from a list. Just press the button for LED Lights Verification instead
You'll then see a list of Cogs and Martys in range, ordered by signal strength
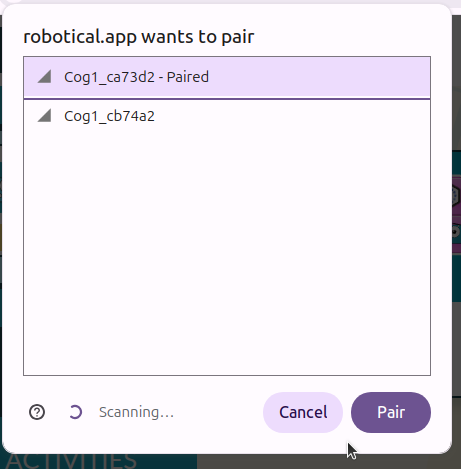
Select the one you want and press Pair. The app will connect and then display a pattern of lights so that you can check you got the right Cog Press Yes if you connected to the right Cog, or No if you need to try again!

Disconnecting
Once connected, you'll see the status of the connection displayed. When you want to disconnected just press the red X
The Cog Interfaces
There are a whole bunch of ways to interact with Cog! From basic games designed to teach younger students how to interact with Cog and the programming environments, to the full blocks interface and even the sensor dashboard that shows data from the sensors on Cog in real time!
Introductory Games
These games are designed to gradually introduce the functions of cog and the Blocks Jr programming environment in a fun way! Students will typically be asked to program Cog to be a controller for a particular game. If they get it right they can play the game, count along as they get up to the required score, and then will proceed to the next one!
These games are in progress, there will be more available soon!
Code Wheel
The Code Wheel is where we first introduce sequencing. It's a super easy place for students to play around with the functionality of Cog and learn about making simple sequences
The Code Wheel begins with three wheels, one for an event, one for lights and one for sounds. Press the up and down arrows on each wheel to rotate it and select different options. When you're ready, press the play button, then interact with Cog to trigger your Code. Press the plus button in the top right to add extra wheels!
Blocks Jr
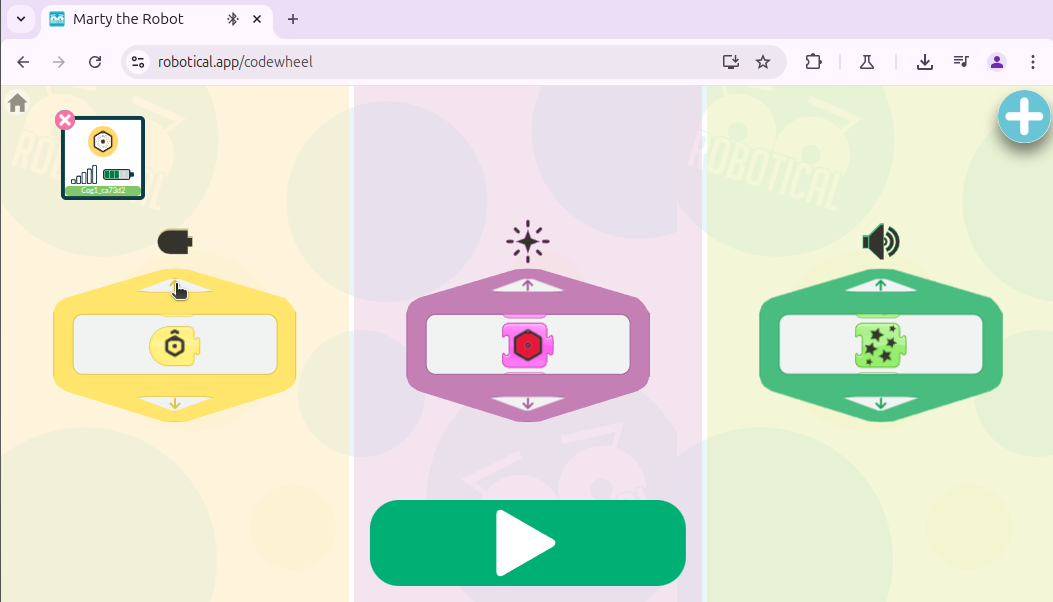
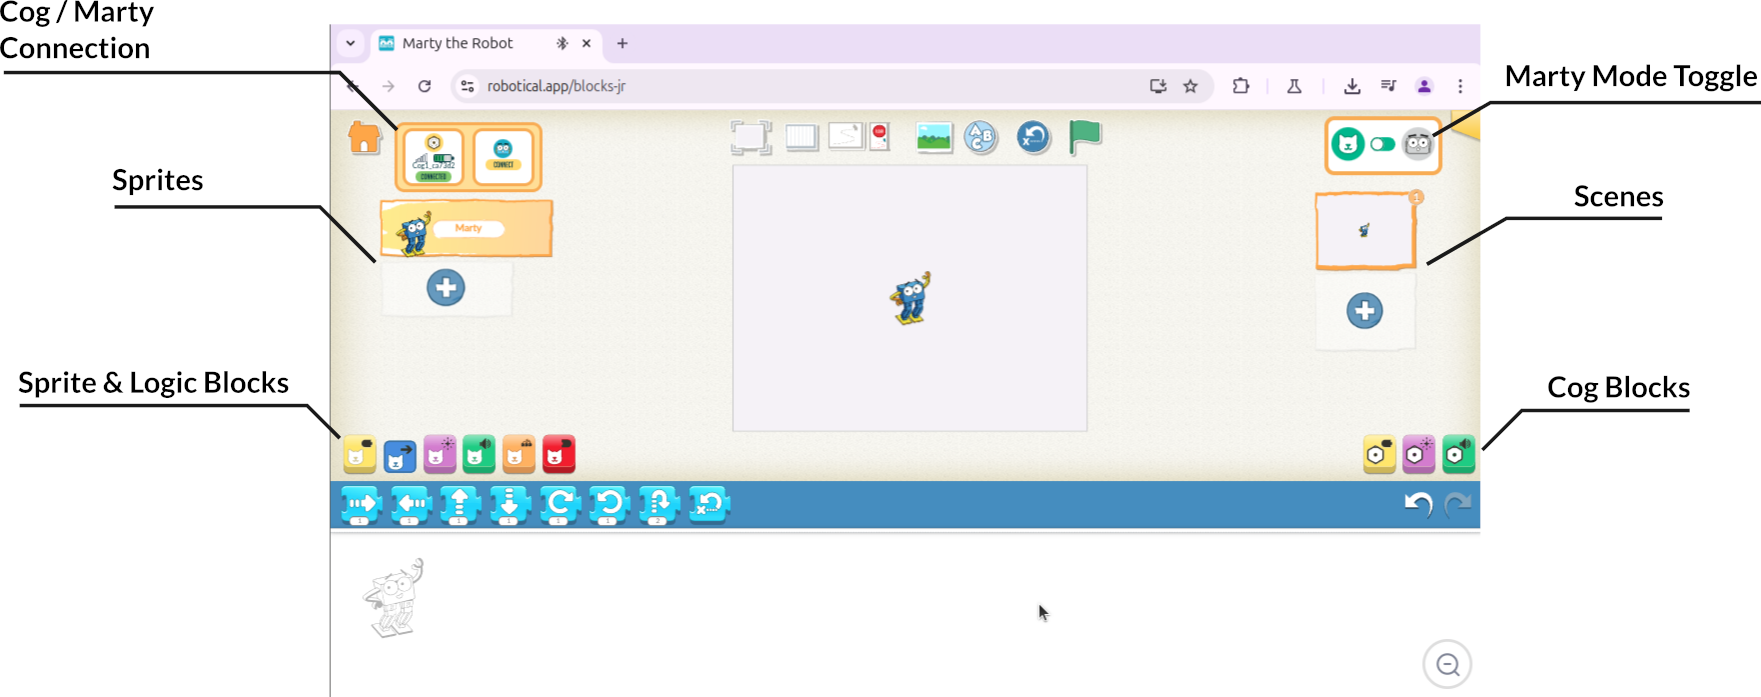
The Blocks Jr Interface is a simple icon based programming interface based on Scratch Jr. Here you can program full sequences of sound and light for Cog, have actions triggered by Cog's sensors, and move around sprites or Marty the Robot!
- Cog / Marty Connection - You can control one Cog and/or one Marty in Blocks Jr. Connect and disconnect without needing to leave the Blocks Jr interface
- Sprites - Add multiple sprites to scenes with the “+” button!
- Sprite & Logic Blocks - The categories here are blocks that work with the sprites, or are general logic blocks like loops
- Marty Mode Toggle - Activating this will change from Sprite mode to Marty mode, and swap the Sprite blocks for ones that'll make Marty move! Use this with a Marty the Robot connected, or just simulate Marty on screen
- Scenes - Add extra scenes with the “+” button!
- Cog Blocks - Most importantly, here are the blocks that let you interact with Cog! Yellow is events, purple is lights, and green is sounds
Press the Home button in the top left when you want to return to the main app
Blocks
The Blocks interface is based on Scratch 3 and gives a full programming interface with much more access to Cog's various sensors and outputs! In the Blocks interface you can connect multiple Cogs and/or Martys, as well as controlling sprites on the screen
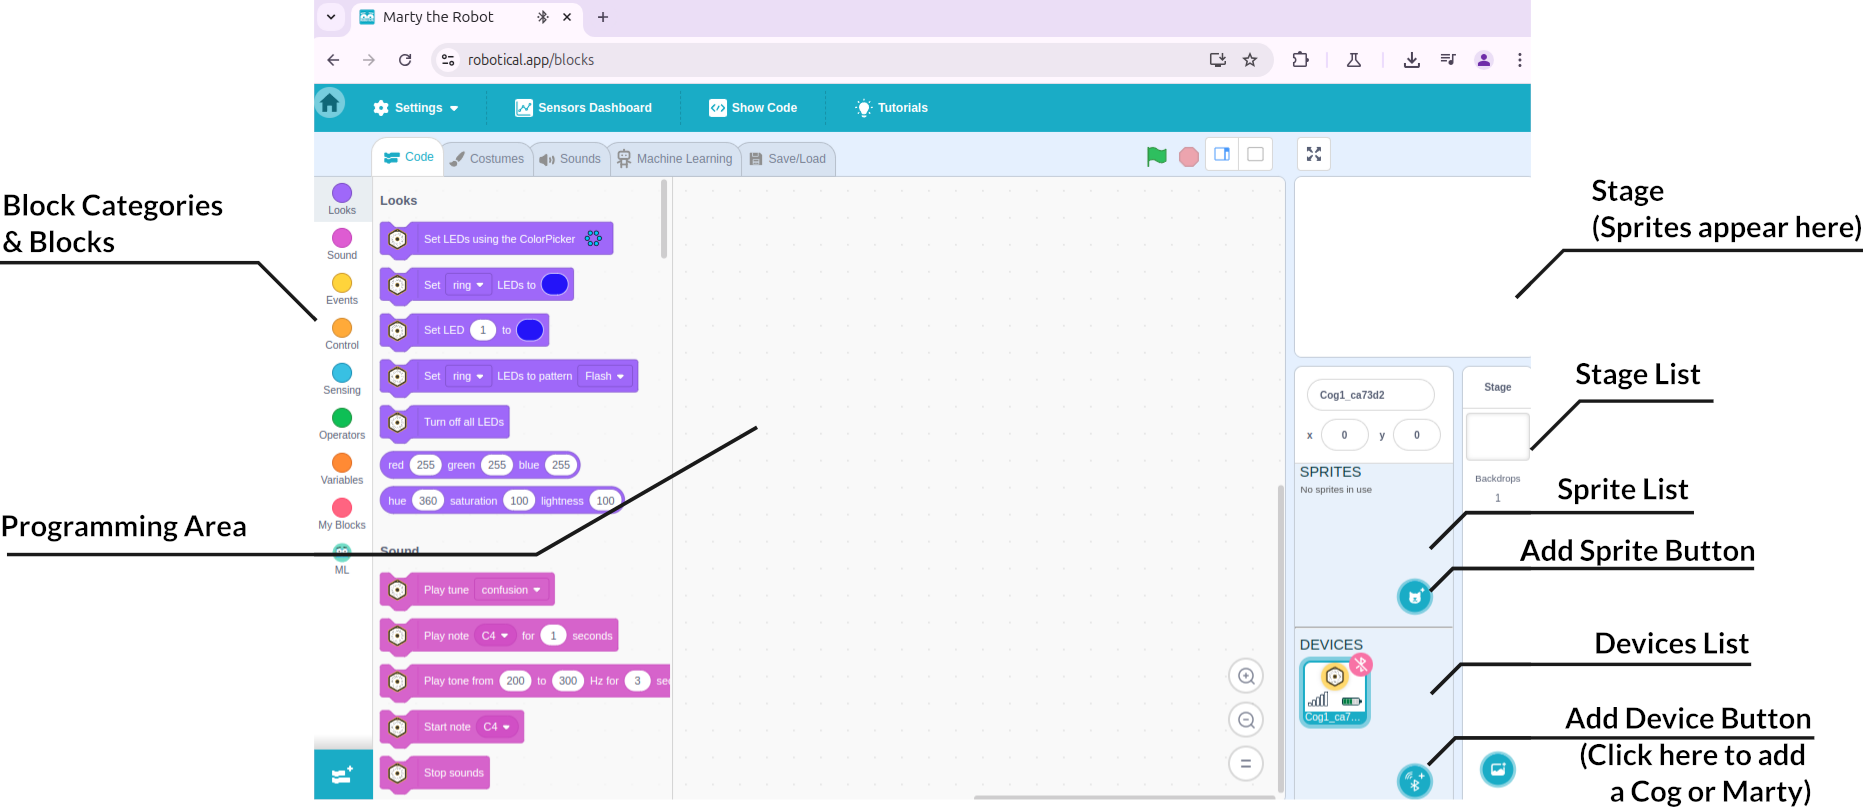
In the Blocks interface, code you write is linked to a particular Sprite, Device or Stage.
To get started you must first add a device (a Cog or Marty) or a Sprite, and then you can select which sprite/device/stage you want to program from the lists on the right.
The blocks on the left will change based on what type of object you've selected - a Cog, Marty, sprite, or stage
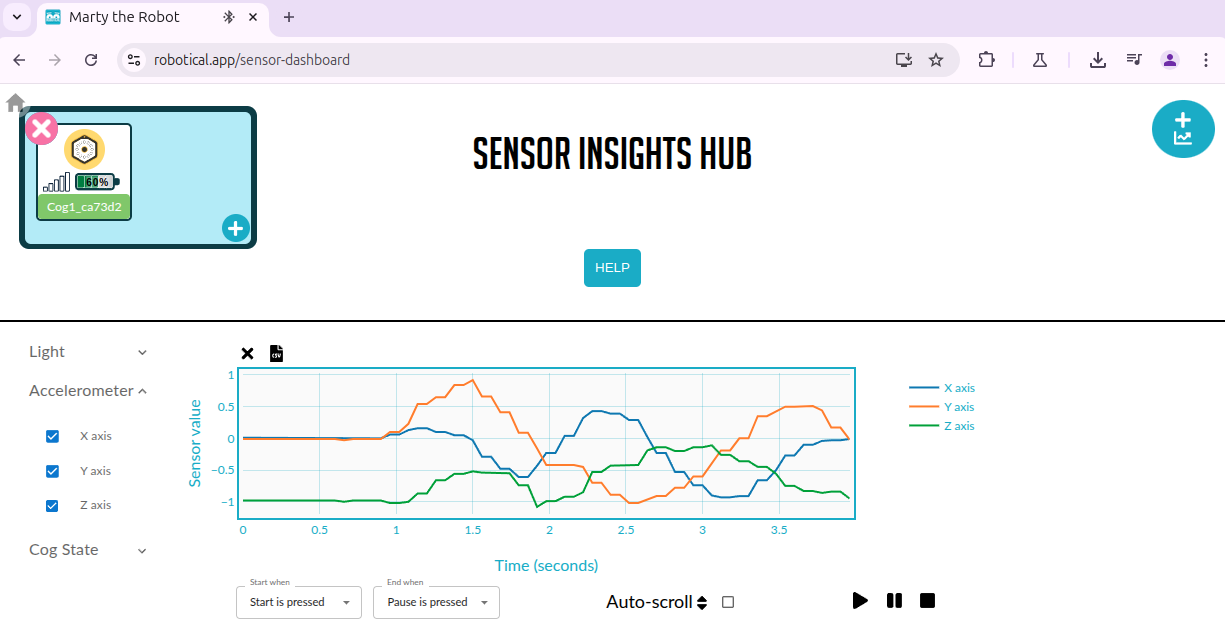
Sensor Dashboard
The Sensor Dashboard lets you see the sensor data from one or more Cogs or Martys in real time! Add a device to it to get started, select the sensors you want to see from the list on the left, and then press play to start showing data!
Cog's Sensors
Acceleration and Tilt
The yellow marker on Cog shows you which way is forwards. To activate the tilt left/right/forward/backward blocks, make sure you're holding Cog flat with the yellow marker pointing away from you!
Ambient Light
The ambient light sensor is inside the yellow point on Cog - if you point it towards a bright light source you'll see the values change
Center Button
The center button on Cog is force sensitive
Obstacle Sensors
The obstacle sensors can give you a simple yes/no reading, or in the Blocks interface can give you a rough distance measurement!