Step 21
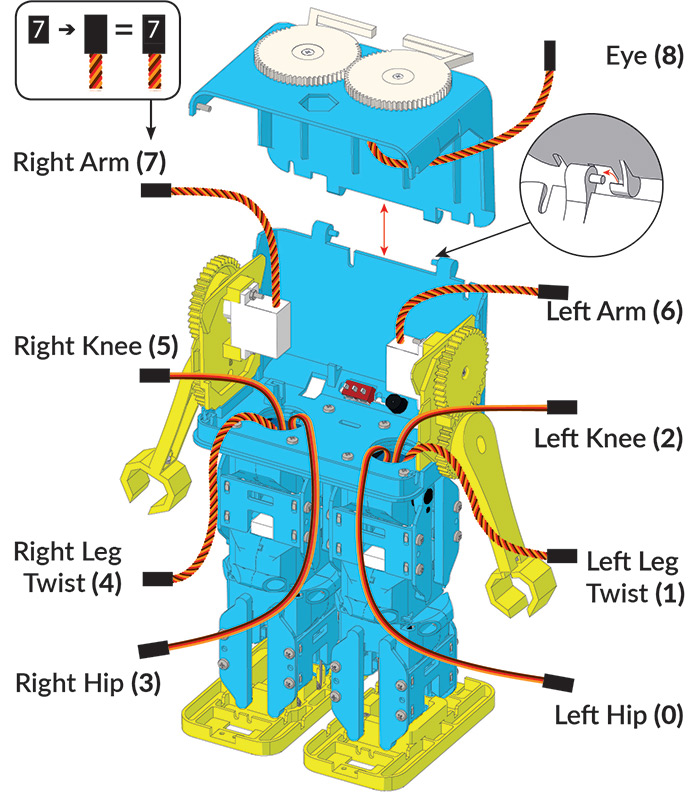
Now you've connected both legs, carefully slot the bottom ridge of the Arm Assemblies into the Head Base, to clip them in place. You might find it easier to leave the arms off until you’ve put the electronics in - but it’s very easy to take them off again.
We'll also clip the Head Base and Head Face together now. These two bits should click into place with a bit of force, and it's easiest to do when the head is 'fully open', as shown in the pull-out circle in the image.
Now is also a good time to number your Servo cables - this is optional, but can help later. See the numbers in the image for which is which.
Step 22
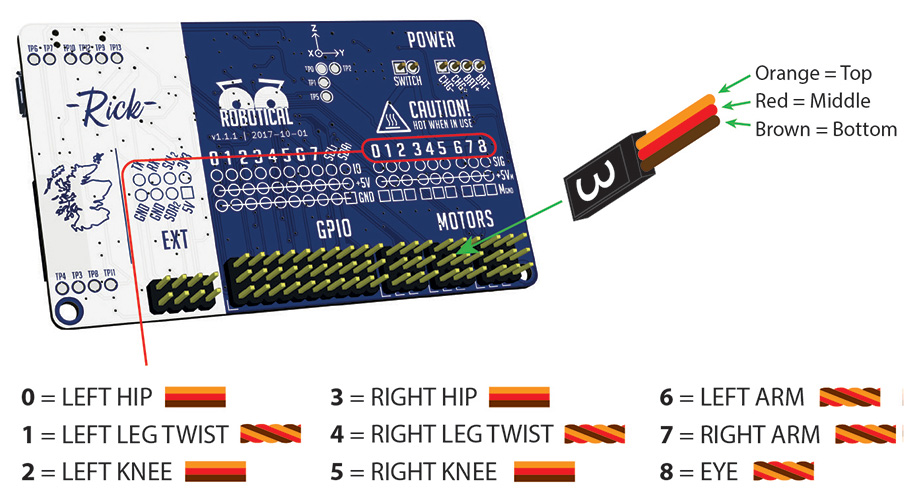
See the image below for how to connect your servos to Marty’s control board, ‘Rick’. Attach the servos the right way up (orange cable facing up) and make sure they are plugged in to the correct pins on the control board. As can be seen in the image, there is a number for each set of pins. These numbers match the cable numbers from Step 21.
Important: It is essential that the servo connectors are attached in the correct orientation and in the correct location. If they aren’t, Marty won’t move correctly. The red wire should go to +5VM as labelled on the board, and the brown to MGND, with the remaining orange wire connected to SIG.
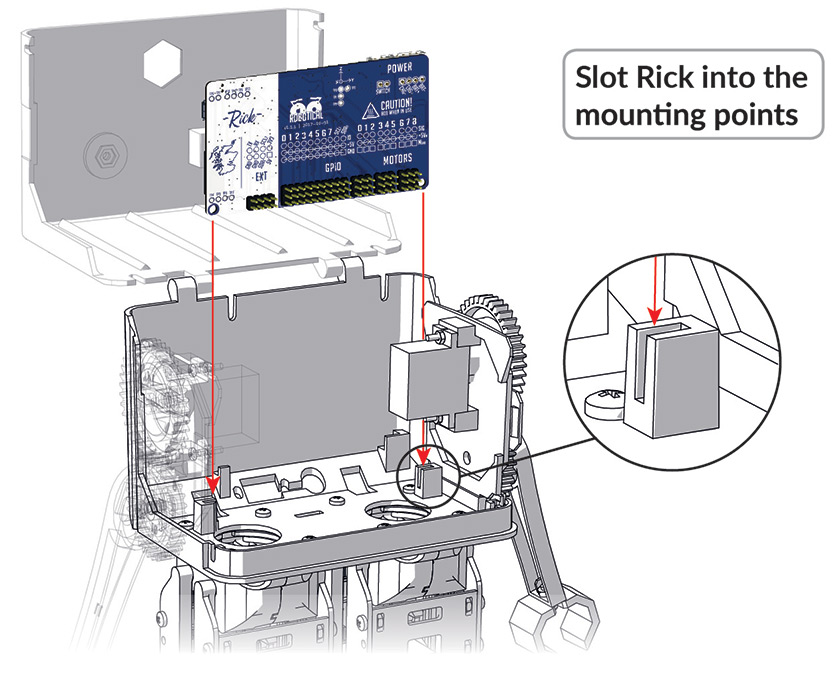
Once you have connected all the servos you can slot the Control Board into Marty’s head. There are a pair of slots inside the head that Rick will happilly sit in.
Step 23
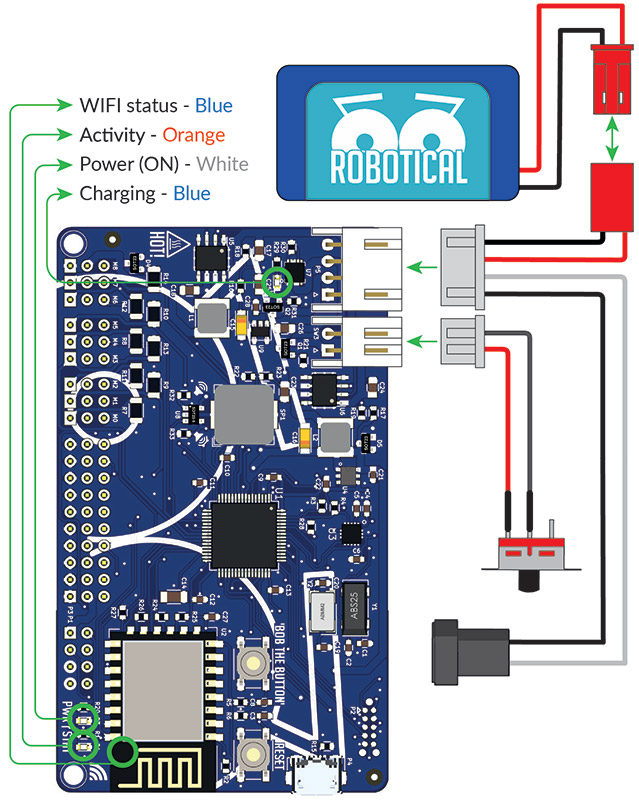
Once you have all the servos attached you can connect the ON/OFF Switch, Power Cable and Battery. Follow the diagram below to see where each component connects to Rick, again paying attention to the orientation of the connectors. All the connectors for the battery, power cable and the switch cable only go in one way around.
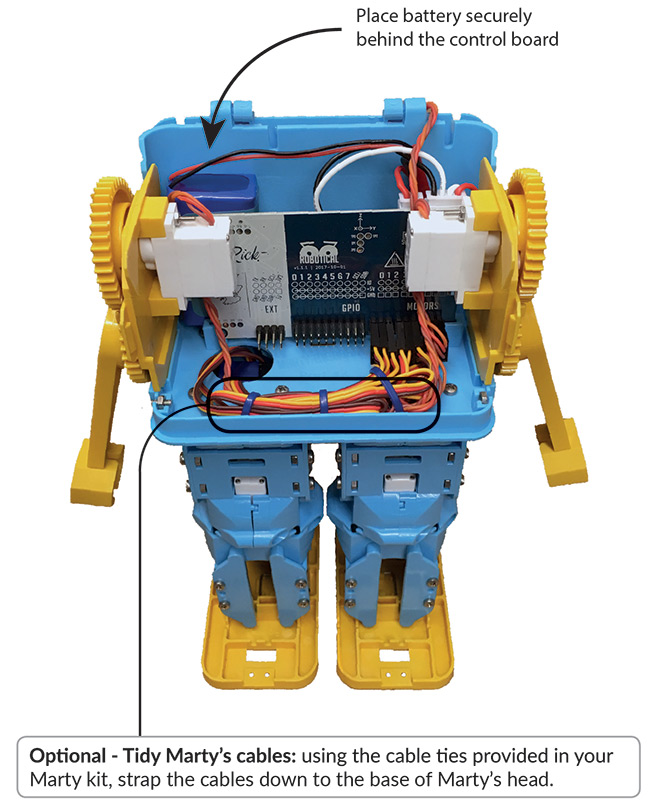
You’ve got some cable ties in your kit, you can use them to keep your wiring tidy. It’ll look neater and then it also won’t get in the way later! You can also pop the battery behind the Control Board in the head.
When you’re done, it should look a bit like this:
Only one more step remaining!
