This document shows you how to get started programming your Marty v2 with MartyBlocks Jr.
What is MartyBlocks Jr?
MartyBlocks Jr (based on Scratch Jr) is a block-based visual programming language targeted primarily at young children as a beginner tool to introduce them to the world of programming. In computing, a visual programming language is a language that lets users create programmes with visual expressions and symbols rather than text; we present this as a series of blocks. It’s like making a jigsaw puzzle out of commands that are grouped together.
You can program routines and a variety of other actions for Marty with MartyBlocks Jr. Additionally, young people can gain proficiency at learning to think creatively and in a computational way, reason systemically and work collaboratively.
Who can use MartyBlocks Jr?
MartyBlocks Jr is suitable for mixed ability classes and does not require any prior knowledge of programming. It is designed especially for ages 5 to 7, but can be used by people of all ages. MartyBlocks Jr has been designed so children can learn through exploring, experimenting and tinkering. This allows children to learn independently, freeing up a parent's or teacher's time so they can engage with other tasks or work with another child. However, you can find a sequence of learning opportunities at Robotical's Learning Platform, where MartyBlocks Jr experiences are described in detail with lesson plans, videos and resources.
How do I access MartyBlocks Jr?
In our App simply click on the MartyBlocks Jr button before or after scanning for and connecting to your Marty V2. Click here to refresh, or learn, how to use our app.
Download the Marty the Robot app here:
Open the Web App
![]()
![]()
What will I see in MartyBlocks Jr?
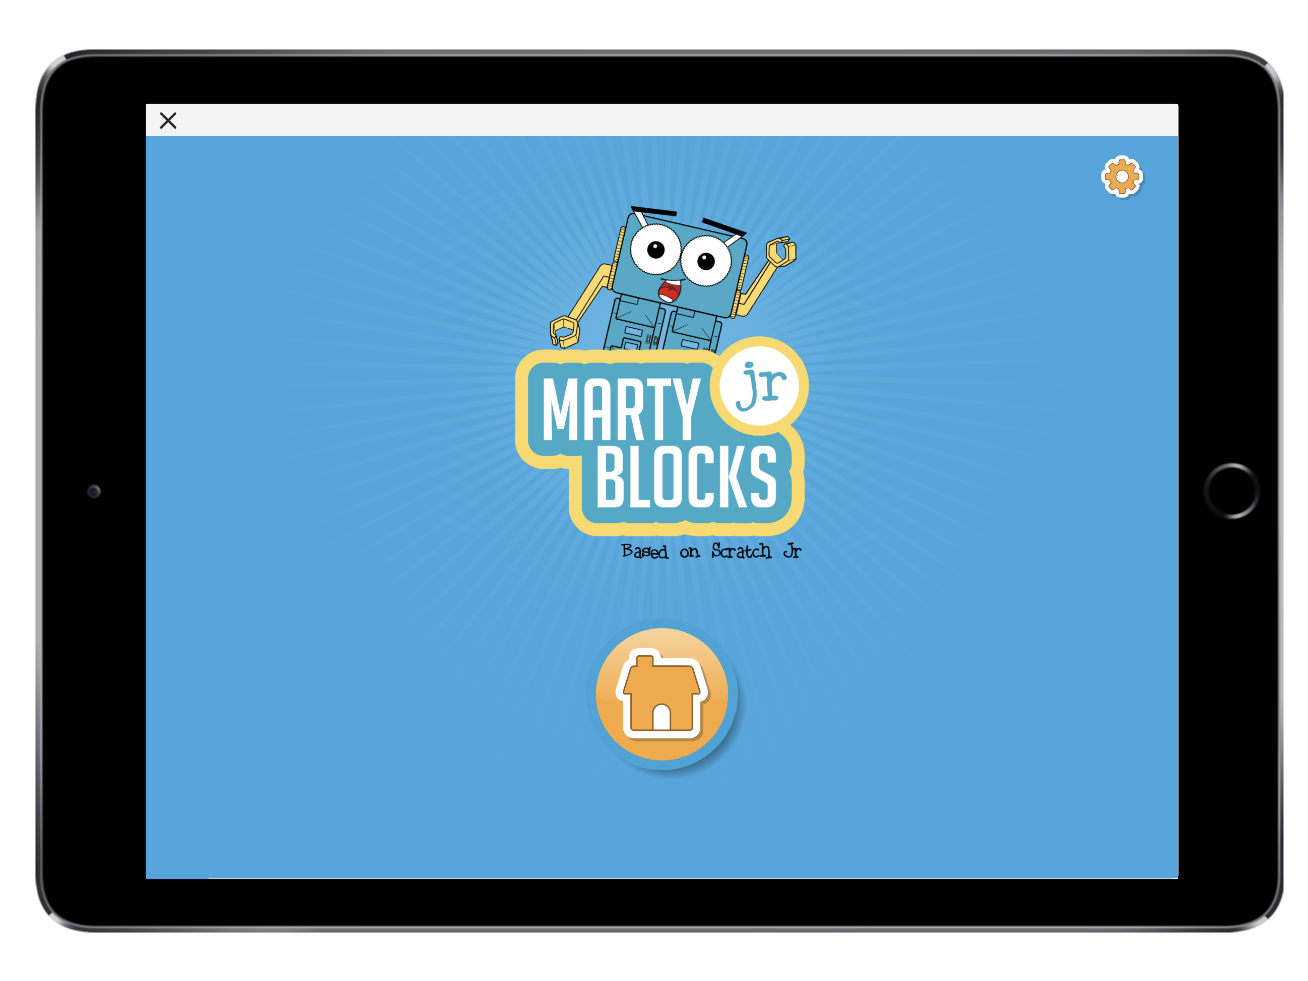
This is the home screen of MartyBlocks Jr. To proceed press the home icon.
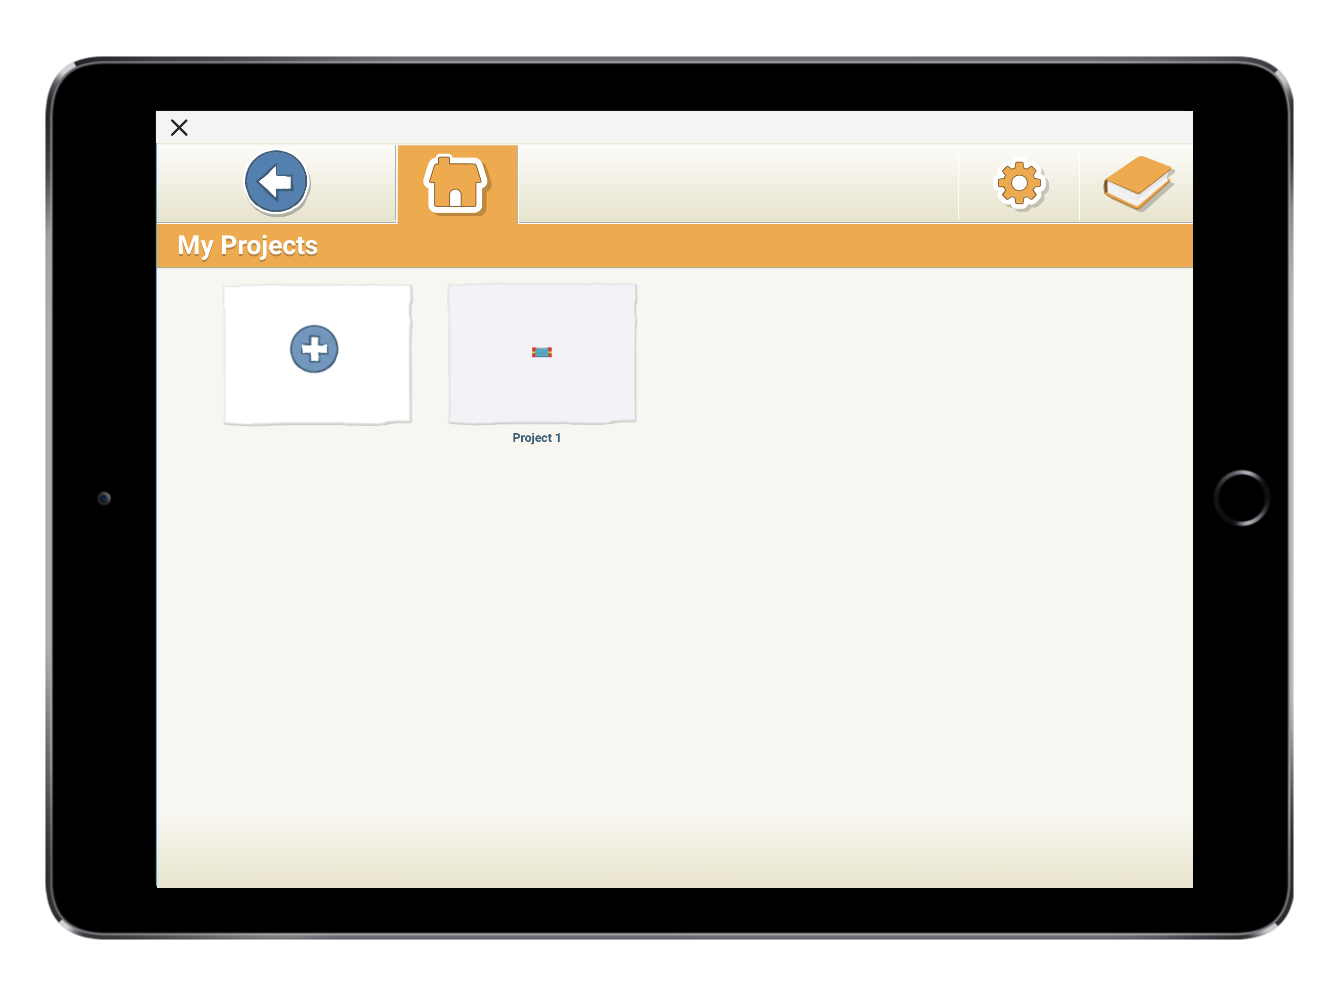
This will then take you to the projects page, as you can see I have lots of projects, but when you start up you won't have any. To start a new project, press the + window.
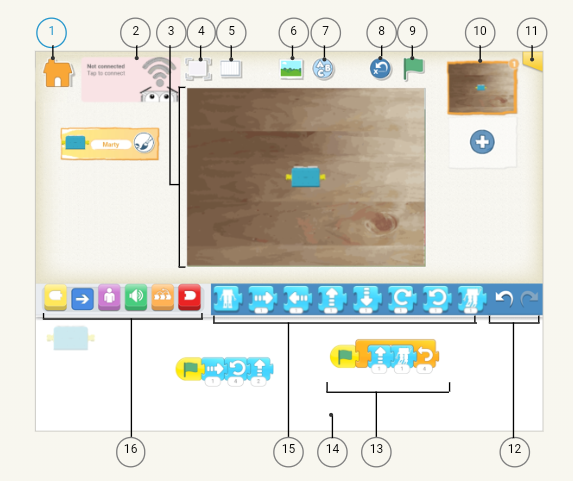
When you open up a project, this is what it will look like. As you can see, there is a lot to take in so I have numbered each button with a description of what it does.
 1. Save - Save the current project and exit to the home screen
2. Connect Marty - Press here to connect your Marty; this will open a different screen where you can connect your Marty as normal. f you haven't connected your Marty before, you can follow steps 4 and 5 in the user guide found here
3. Stage - This is where you see the Marty sprite performing the program you make.
4. Presentation Mode - Expand the stage to full screen
5. Grid - Turn on (and off) the x-y coordinate grid
6. Change Background - Select or create a background image for the stage.
7. Add Text - Write titles and labels on the stage
8. Reset Marty - Bring Marty back to their starting position on the stage. (Drag Marty to set up new starting position)
9. Green Flag - Start all programming scripts that begin with the green flag as the first block.
10. Pages - Select among the pages in your project- or tap the plus sign to add a new page. Each page has its own Marty and a background; you will start with one page, that has a blank background. To delete a page, press and hold it. To reorder pages, drag them to new positions.
11. Project Information - Change the name of the project and see when the project was created.
12. Undo and Redo - If you make a mistake, tap the left undo arrow to reverse the last section. Tap the right redo arrow to reverse the last undo.
13. Programming Script - The collection of blocks you snapped together to make a programming script, telling Marty what to do. Tap anywhere on a script to make it run. To delete a block or script, drag it outside the programming area.
14. Programming Area - This is where you connect programming blocks to create scripts, telling Marty what to do.
15. Block Palette - This is the menu of programming blocks for a specific section or category. Drag a block into the programming area, then tap on it to see what it does. Tapping the block, while still in this area, will reveal the name of the block.
16. Block Categories - This is where you can select a category of programming blocks:
- triggering blocks, the yellow blocks get things started;
- motion blocks, the blue blocks get Marty physically moving;
- looks, the purple blocks alter how Marty expresses themself;
- sounds, the green blocks have a range of sounds;
- control, the orange blocks affect the timing and the way the blocks are carried out;
- end blocks, the red blocks
You can find out more about what each individual block does by selecting the book in the top righthand corner of the projects page and select block guide.
If you would like to learn more about MartyBlocks Jr and Marty, in general, then check out our lesson site to learn about new and exciting ways to code!


