If you've received your Marty after 2020 it's likely you have a version 2!
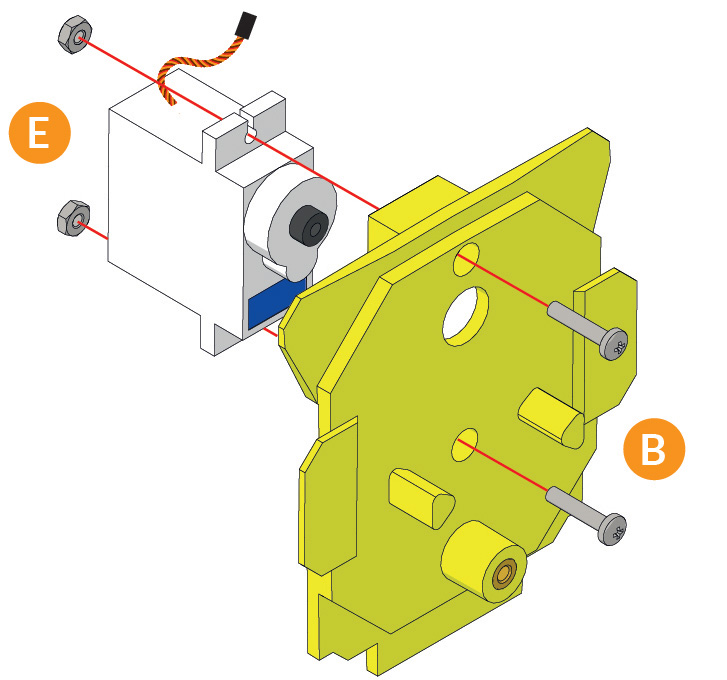
Step 12 - Build x2
Attach a white Arm/Eye Servo to each Side Panel using two 2x10mm Bolts and 2mm Nuts for each one.
This can be a bit fiddly, we find the easiest method is to use a finger, piece of tape or blu-tac to hold the M2 Nut in place as you get the Bolt lined up. If you’ve got tweezers, you can also do it backwards with the nut in the hole.
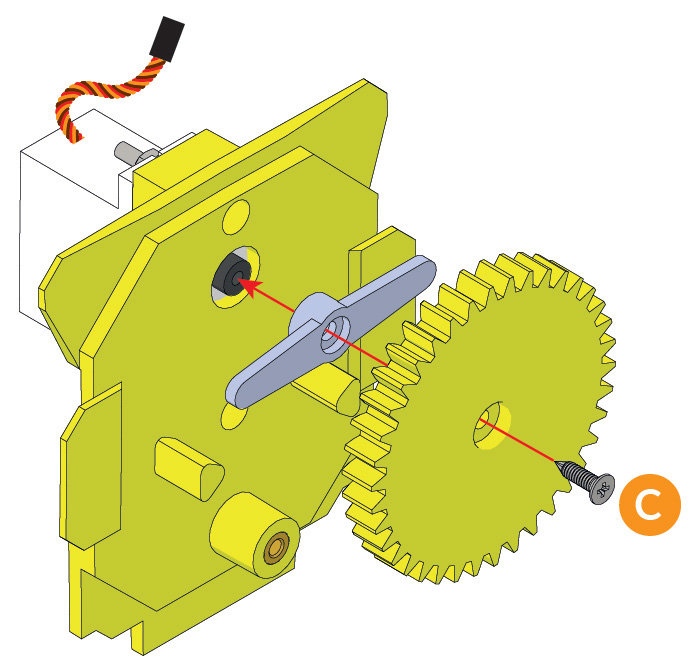
Step 13 - Build x2
Now we’re going to attach the propeller-shaped horn and the Arm Servo Gear. First, push the horn down onto the geary-bit of the servo that sticks out, then place the Arm Servo Gear on-top.
Secure both parts in place with one of the Servo Horn Screws. The orientation of the horn here is not super-important, but horizontal works best, as shown.
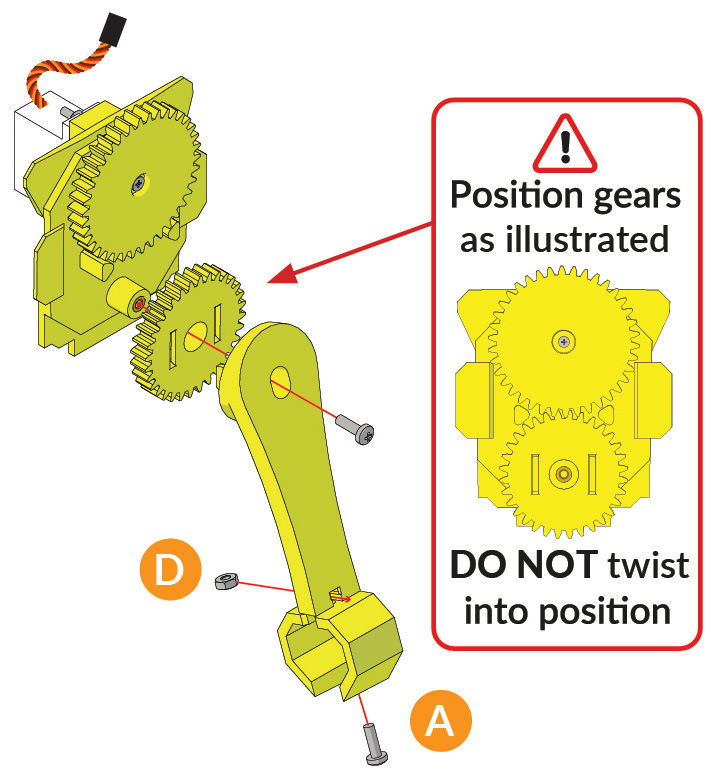
Step 14 - Build x2
Place the Arm Gear onto the cylindrical shaft on the Side Panel, and then slot the Arm into the Arm Gear. Once you’ve done this, screw a 2.5mm bolt in to hold it all together. Be careful not to over-tighten. Now, attach the Hand to the Arm using a 2.5mm Nut & Bolt.
That’s the arms done! Put them aside and we’ll move on to the Head…


