The noise sensor add-on can be used to measure overall noise level, it can't be used like a microphone to distinguish specific sounds, but you can use it to detect loud sounds like a clap, or show the "envelope" of a sound
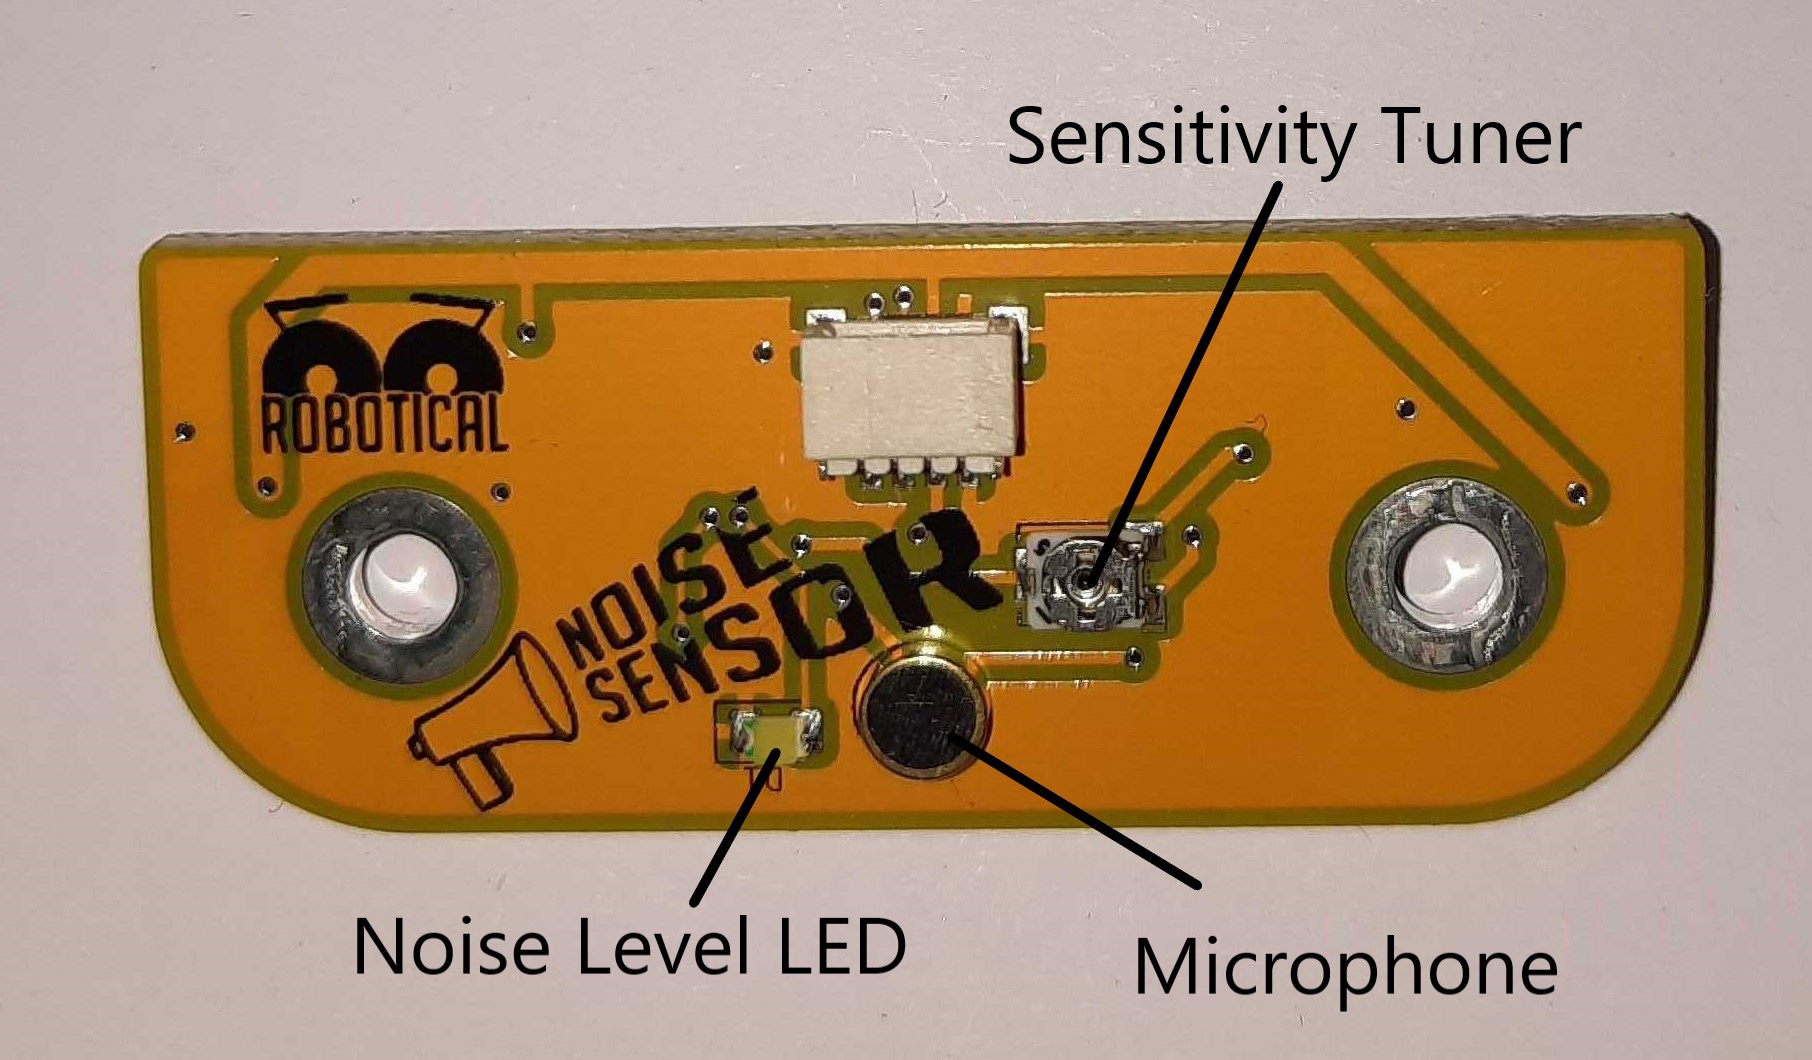
Front of noise sensor, showing the microphone, sensitivity adjustment and noise level LED
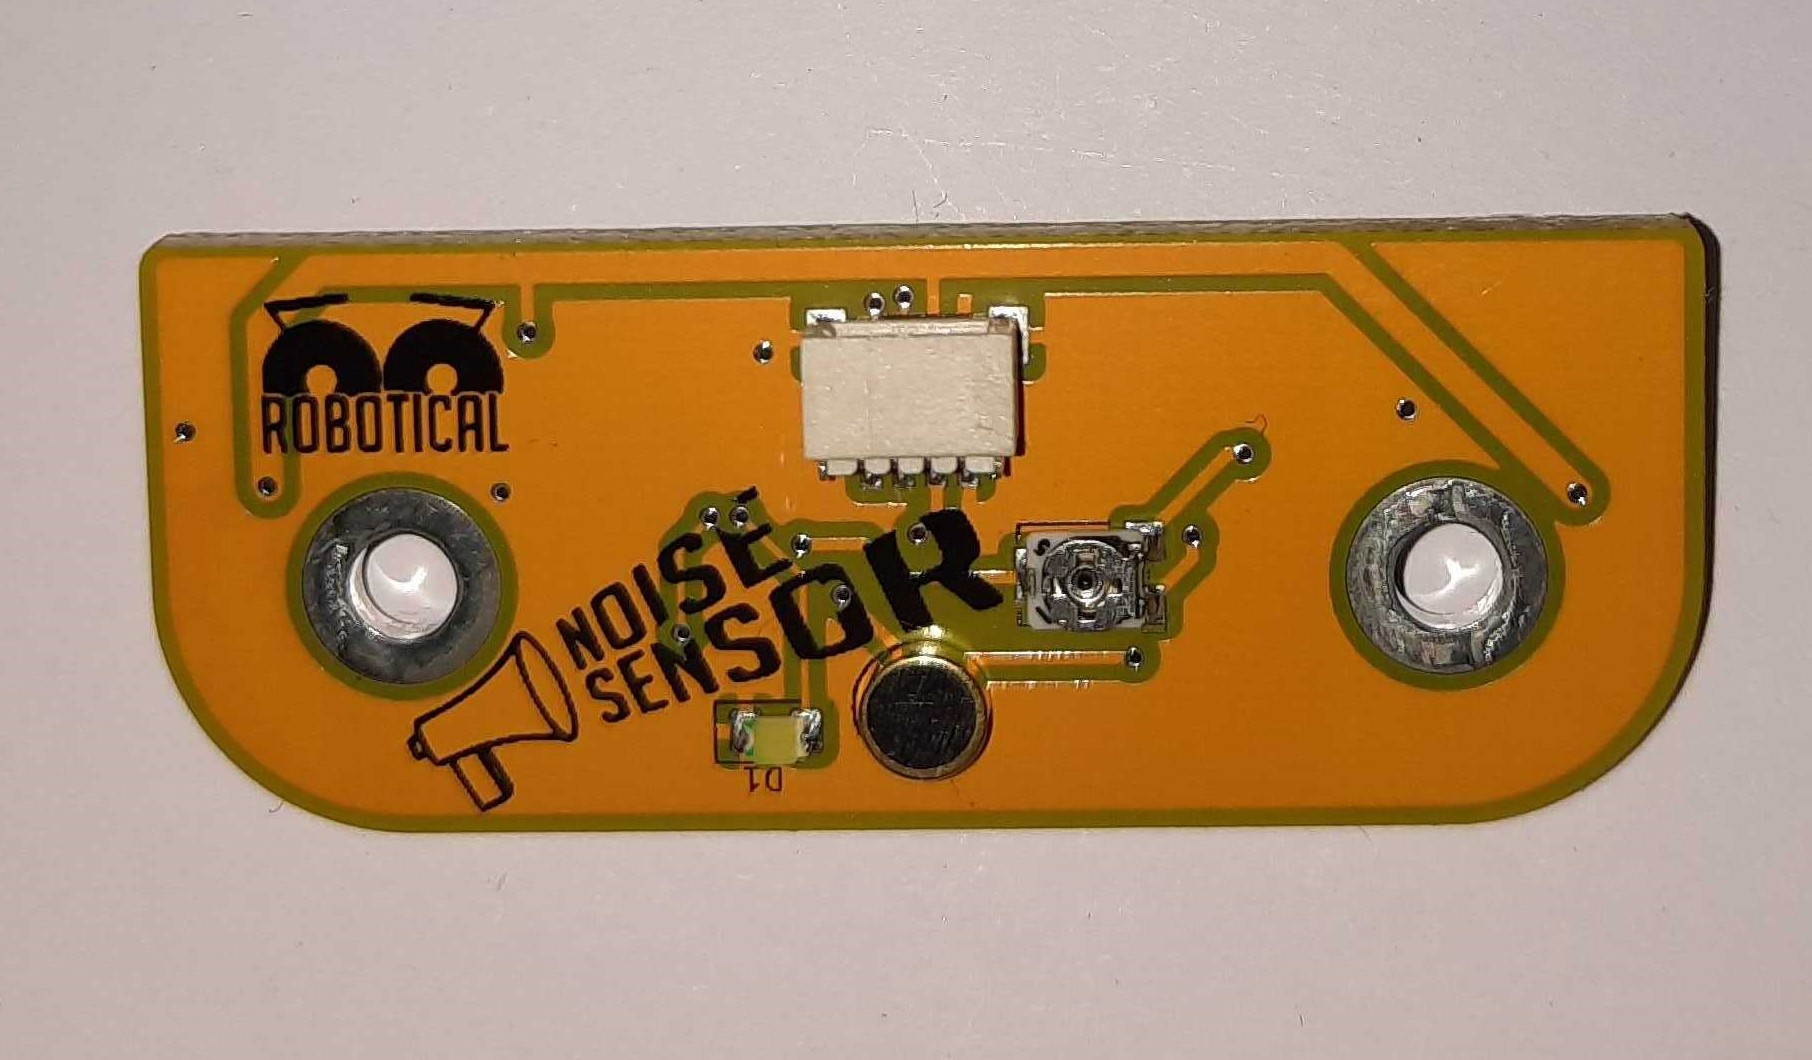
Back of the noise sensor, showing the i2c connectors, microcontroller and the rest of the circuitry
Set Up
The noise sensor is designed to attach to one of the two attachment points on each of Marty's feet - the front or the back.
Step 1: Decide where to mount the sensor, and ensure you have a free cable
You may need to unscrew and disconnect an existing sensor to make space for the noise sensor. Alternatively mount it at the back of the foot instead.
Step 2: Connect the cable to the noise sensor
Connect the black i2c cable to either socket on the noise sensor - it doesn't matter which one
Step 3: Fix the noise sensor board to Marty
Use two M3 nuts and bolts to firmly fix the noise sensor to the foot.
Checking and Configuring the Sensor
When you are connected to your Marty from the Marty the Robot v2 app, select Configure then Add-ons to get to the Add-on configuration screen.
The noise sensor in the add-on list
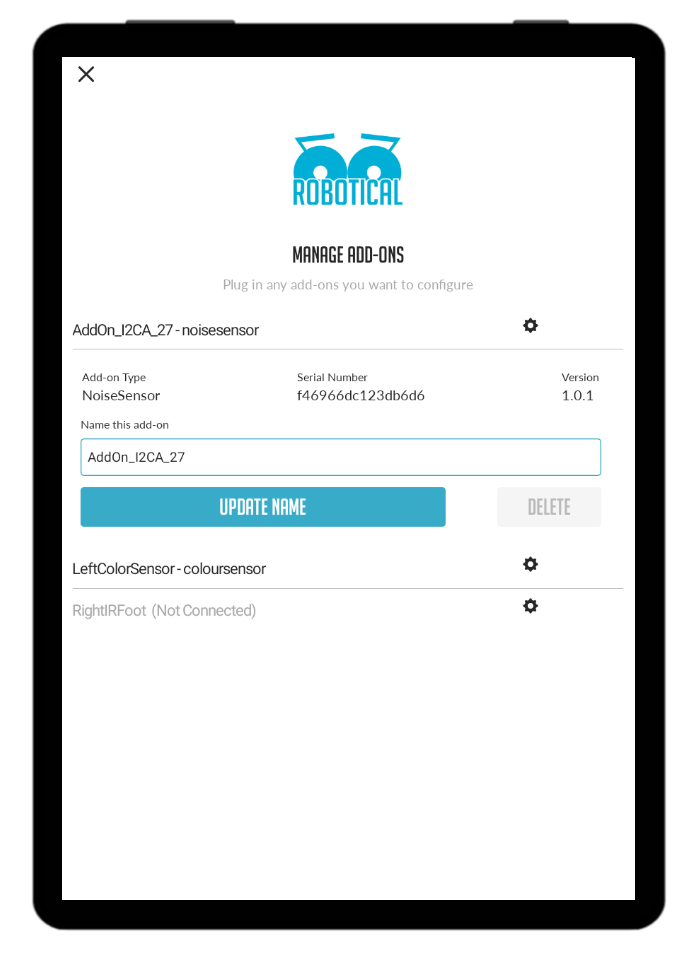
Your noise sensor should be shown in the list of addons. It will have a default name like “AddOn_I2CB_27” unless you have previously given it a name.
There is no need to rename the sensor unless you have more than one
When you select the noise sensor from the list, the LED on it will flash for a few seconds - this can help to identify which sensor is which, if you have more than one.
Using the Noise Sensor
Marty must be running off battery for the noise sensor to function correctly. When on USB power results may be less reliable.
Noise Level LED
The white LED on the board will light up when the sensor hears noise. Try whistling at the sensor or clapping to see it react
Tuning the sensitivity
To adjust the sensitivity of the sensor, use a small screwdriver to turn the sensitivity trimmer on top of the board
The sensitivity tuner can be turned to change the amount of noise that activates the sensor
Using with MartyBlocks
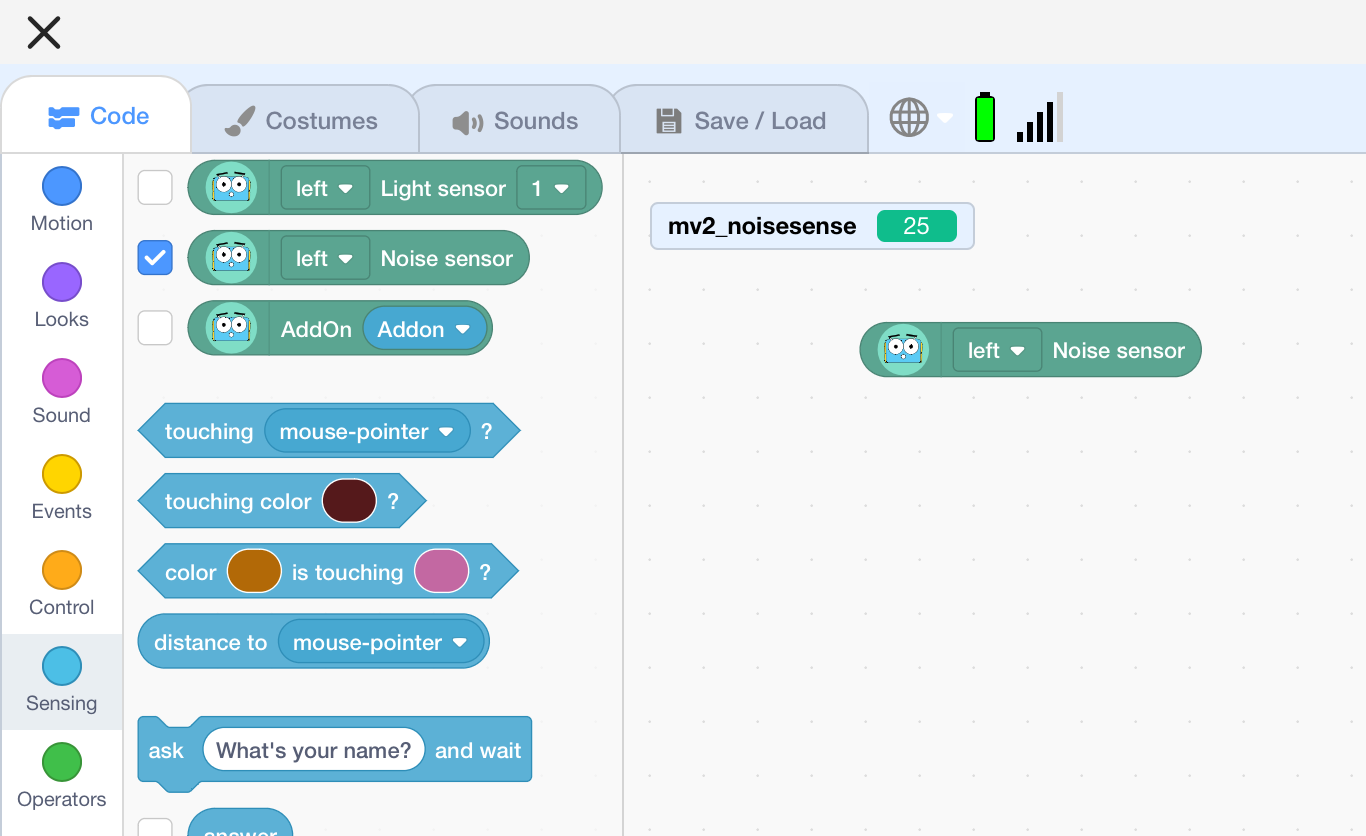
The noise sensor can be read using the “<left/right> noise sensor” block under Sensing.
If you only have one noise sensor, it doesn't matter if you select the left or right option. If you have two noise sensors you must name them LeftNoiseSensor and RightNoiseSensor in the add-on configuration screen for them to be identified correctly.
The block will always return a positive number, with a higher number meaning more noise
Click the checkbox next to the noise sensor to see a live display of the sensor value
Example: Clap activated Marty
The code shown in the screenshot here makes Marty dance if you clap twice in quick succession. A single clap, or two claps with a delay in between will be ignored
Marty double-clap activated dancing
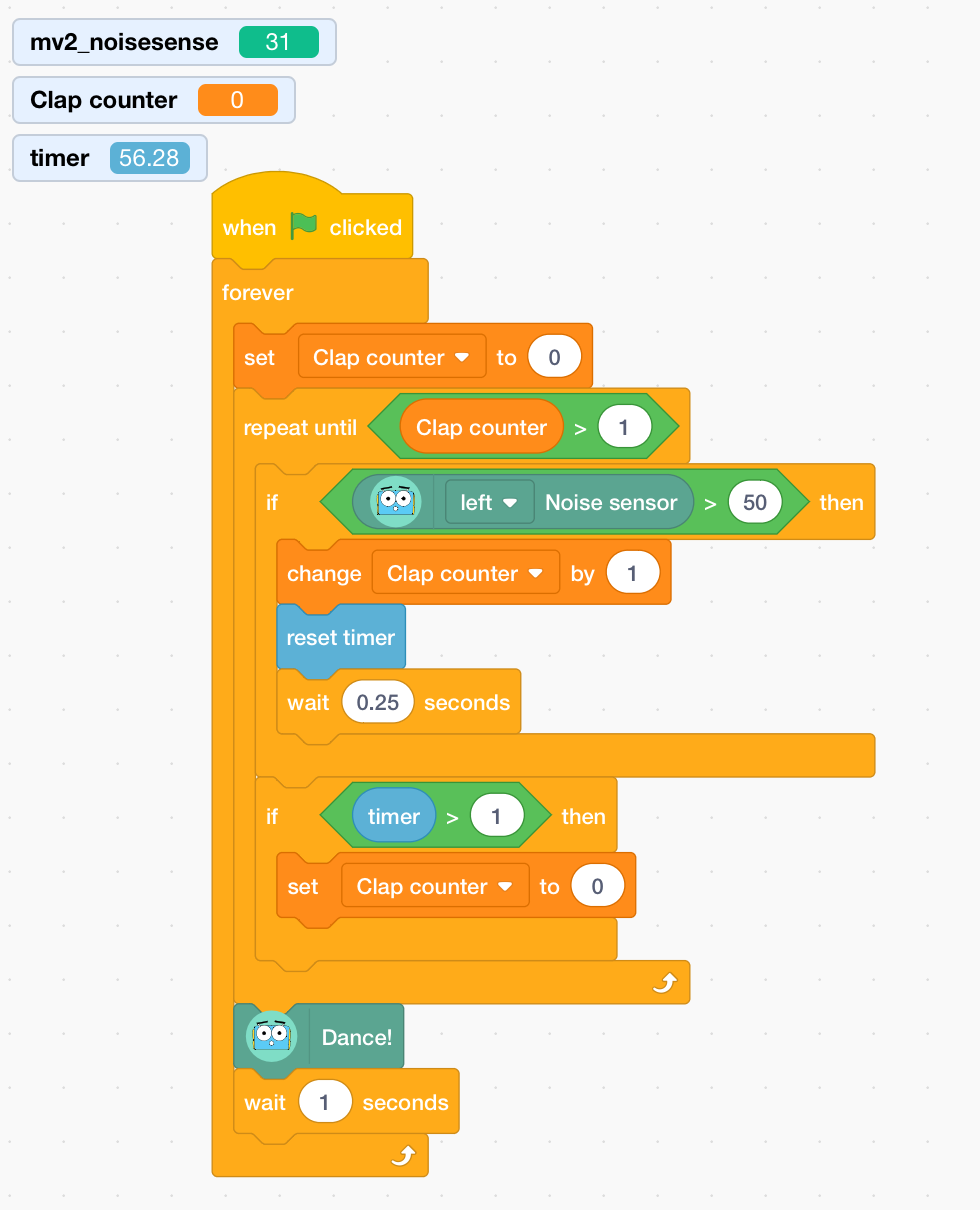
In this example we use a variable named clap counter to count the number of claps - when it reaches 2 Marty is told to dance. The MartyBlocks (based on Scratch) timer is used to count the timing between the two claps, and reset the system if a second clap doesn't happen quickly enough.
A video showing double-clap activated dancing! Two quick claps must be used to activate Marty
Example: Graphing the sensor output
The code shown here makes a graph of the readings from the noise sensor
Using a sprite and the Pen extension to make a graph of sound level
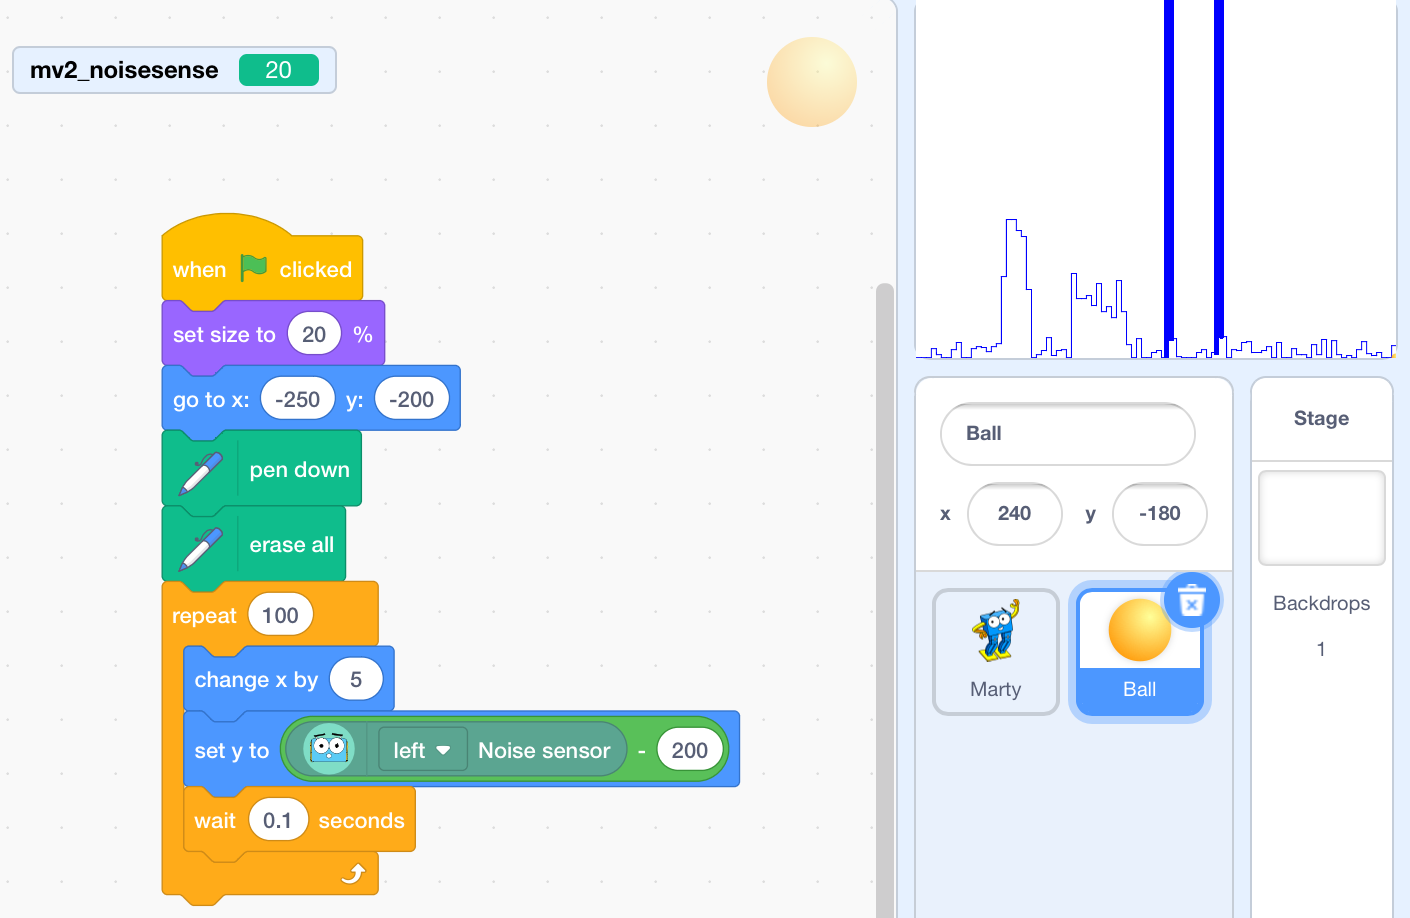
In the screenshot here, the graph shows noise over a few seconds. The smaller bumps are whistles, and the two short, sharp spikes are claps