Guide for Audio Classification Model with Marty the Robot
This guide explains how to create and use an audio classification model, and have Marty the Robot respond to predictions in MartyBlocks.
Step 1: Create an audio classification model on Marty Blocks
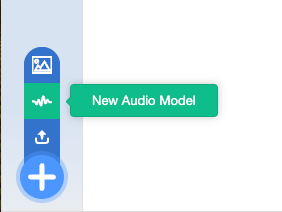
Navigate to the Machine Learning tab, press the “Add” button at the bottom left corner, and select “New Audio Model”.
If a new dialog box comes up asking you if you are sure, press continue.
Step 2: Model Name
You can start by giving your model a new name!
Type the new model name in the “Model” input at the top.

Step 3: Data Collection
You can now start collecting data for your classes! As a general rule of thumb, the more data you give to the model the better will perform, although the quality of the data is equally important!
Just type the name of the class you want to collect data for in the “Collect Data for” input and press the “Record” button.
Repeat this process for all the classes you want to collect data for.
You can collect more samples for each class by pressing the “Record” button again.
Note that the audio model requires at least 10 samples for the Background Noise class.

Step 4: Train Model
Once you have collected enough data for your classes, you can train your model by pressing the “Train” button.
Once the training is complete, you will see the Loss graph which plots the training loss over training iterations (epochs).

Step 5: Run Model
Once you have trained your model, you can run it by pressing the “Run” button.
You will see the predictions for each class in the “Predictions” table.

Step 6: Save Model
Once you are happy with your model, you can save it by pressing the “Save” button.
Note that once your model is saved you will not be able to collect more data for it.

Step 7: Load and Run Model in MartyBlocks
You can now load your model in MartyBlocks and use it to make predictions!
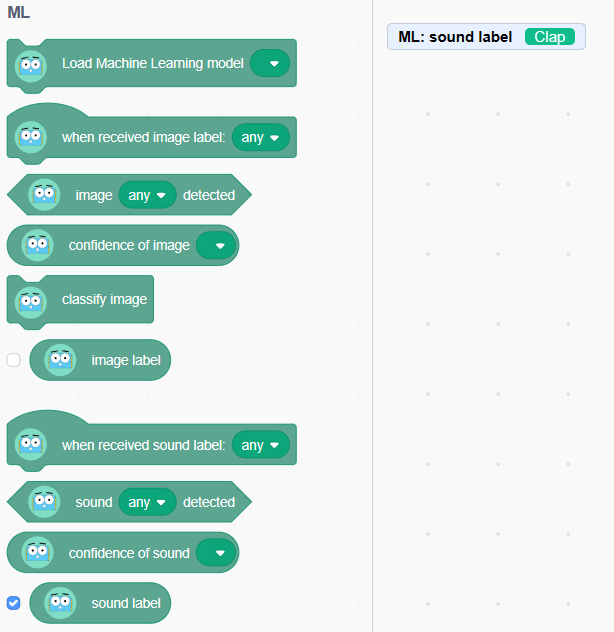
First, navigate to the Code tab and scroll down to the Machine Learning blocks section.

Step 8: Load Model in MartyBlocks
Use the “Load Marty Machine model” block and select the model you want to load.

Step 9: Make classifications in MartyBlocks
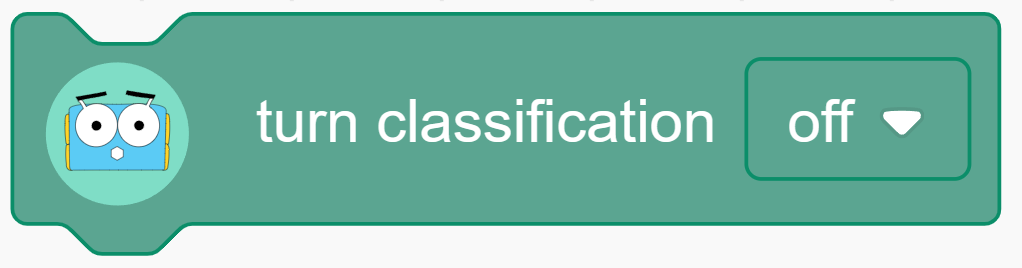
Sound classifications should start automatically after importing the model. You may toggle classifications on and off using the “turn classification” block.
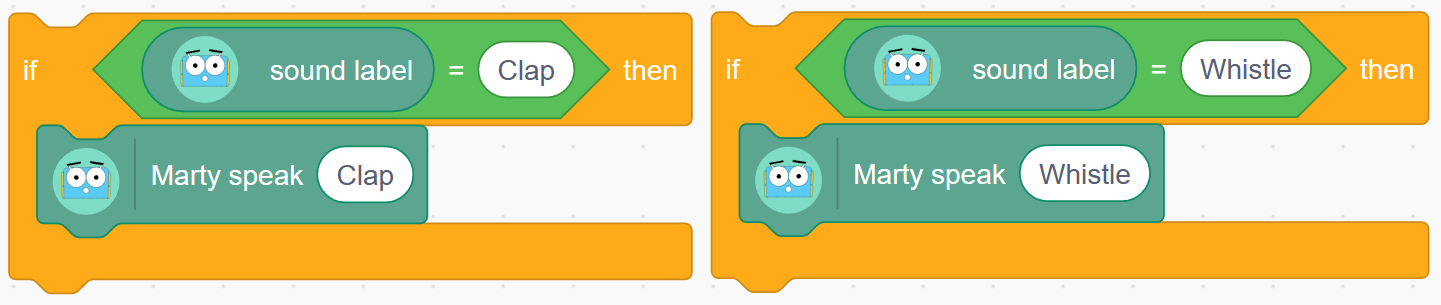
Once you have executed the command to import your classification model, the class labels will be available for selection in some blocks. There are a few ways to make predictions:
Event handler:

Boolean:

Variable:
To see the value of the “sound label” variable, check the box beside the variable in the Teachable Machine menu.
Step 10: Changing the classification rate and confidence threshold (optional)
To make changes to the rate of classifications, use the “Label once every seconds” block
To make changes to the confidence threshold, use the “set confidence threshold” block. The default confidence threshold is 0.5 (i.e. 50%).
