Get started with Blocks Jr in the current Robotical app. This guide explains how to create a project, program on-screen characters, and build a program for your Marty V2.
What is Blocks Jr?
Blocks Jr is a visual programming environment based on ScratchJr. Instead of typing code, you join picture blocks together to make a program. Children can create stories and animations with on-screen characters, then use robot blocks to control Marty.
It is designed especially for ages 5–7, with no previous programming experience needed. Learners of other ages can use it too. For classroom activities, lesson plans and videos, visit Robotical's Learning Platform.
How do I access Blocks Jr?
Open Blocks Jr in the Robotical web app. You can also open the main Robotical app and choose Blocks Jr.
For a tablet, install the current Robotical app and choose Blocks Jr:
You can create projects and program on-screen characters without connecting a robot. To control a physical Marty, connect Marty and select Marty mode, as explained below.
Create and open projects
Blocks Jr opens on My Projects. There is no separate welcome screen to work through.
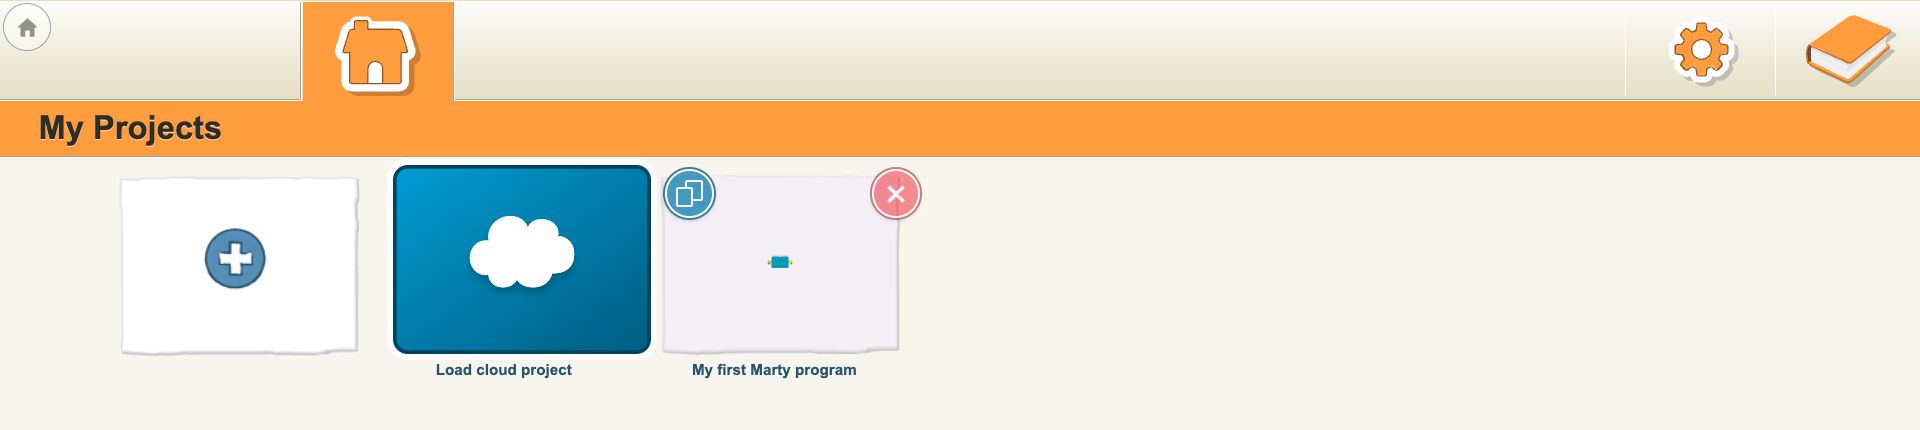
- Select the plus (+) tile to create a new project.
- To continue an existing project, select its thumbnail.
- In the editor, select the yellow project-information tab at the upper-right edge to change the project name. Select the tick to return to the editor.
- Select the orange home button on the left of the editor to save and return to My Projects.
Projects stored locally are opened from the same browser or app on the same device. Load cloud project opens the cloud-project options; the project-information screen also has SAVE and LOAD controls. Follow their on-screen instructions when using cloud projects.
Saved project tiles have separate duplicate and delete buttons. Use duplicate to make a copy before experimenting with an existing project.
Sprite mode and Marty mode
Use the switch between the character icon and Marty's face at the top right of the editor to choose what you are programming. The block categories change with the mode.
Sprite mode: on-screen characters
In sprite mode, select a character from the list on the left. Its scripts appear in the programming area, and its actions are shown on the stage. A new project starts with a Marty character.
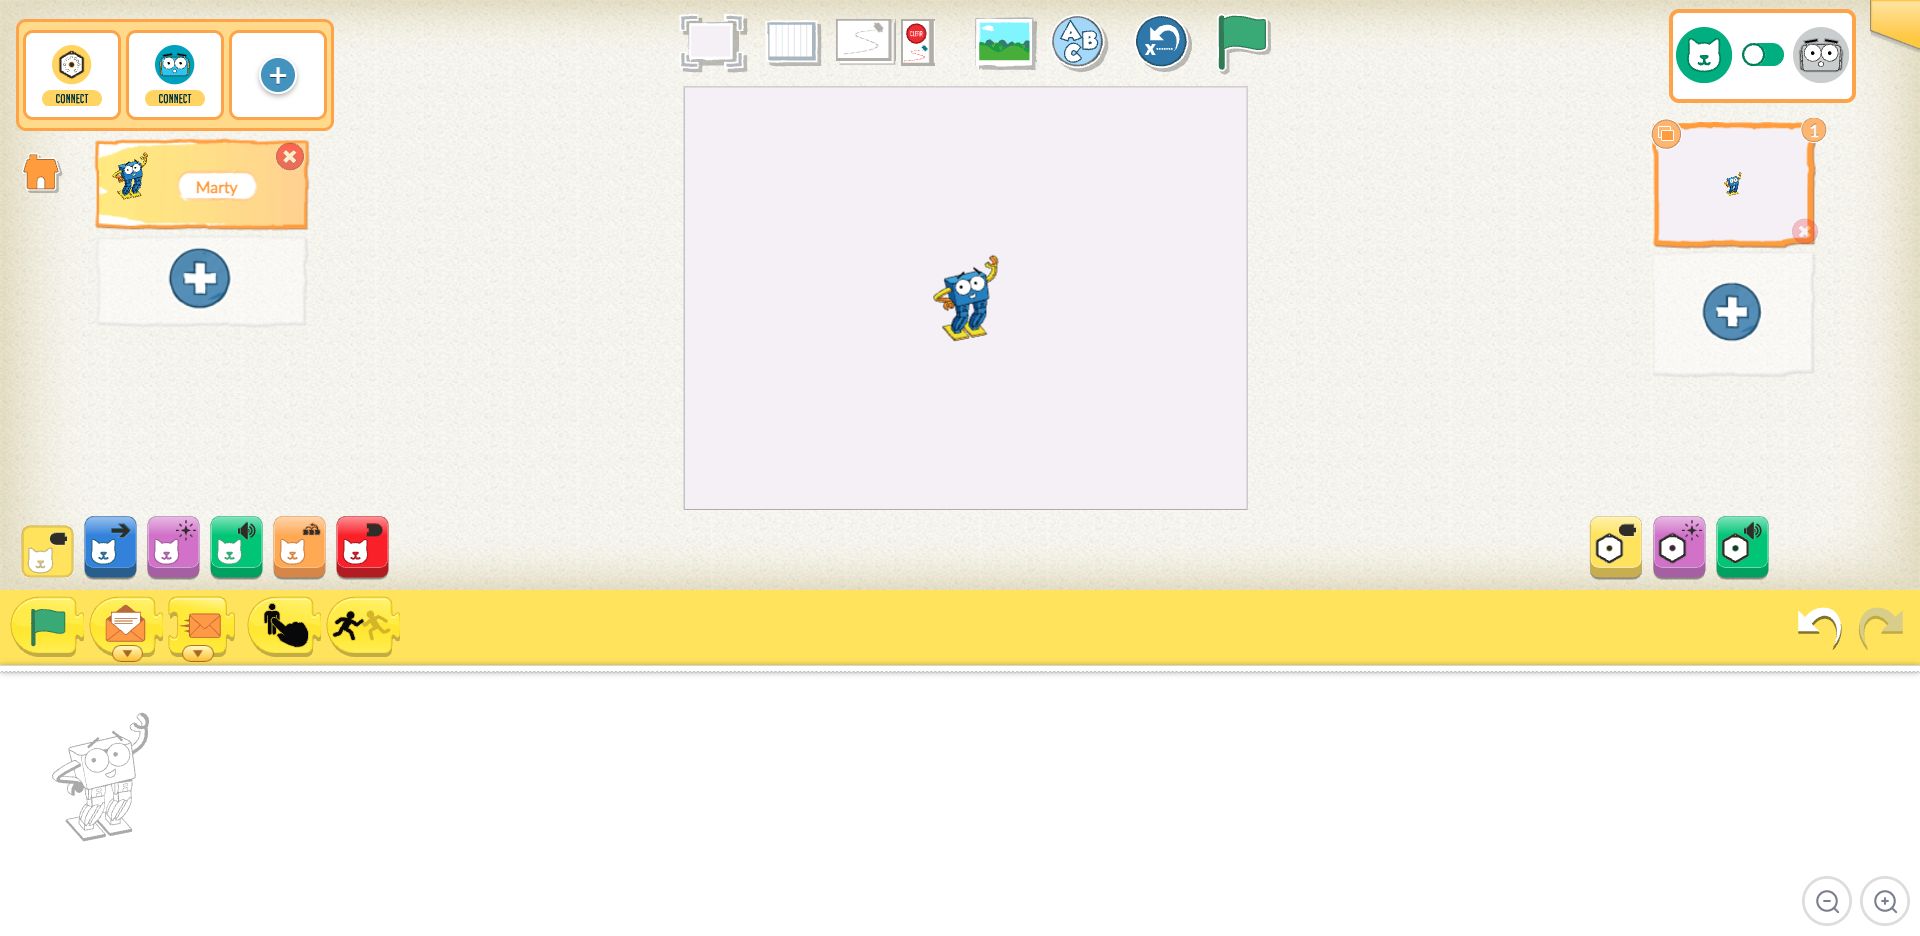
The character icon is highlighted in this mode. Moving the Marty character on the screen does not, by itself, program a physical Marty.
Marty mode: robot programs
Select Marty's face using the same switch. The left panel changes to Marty Mode, the stage shows a bird's-eye view of Marty, and the categories on the left contain Marty's robot blocks.
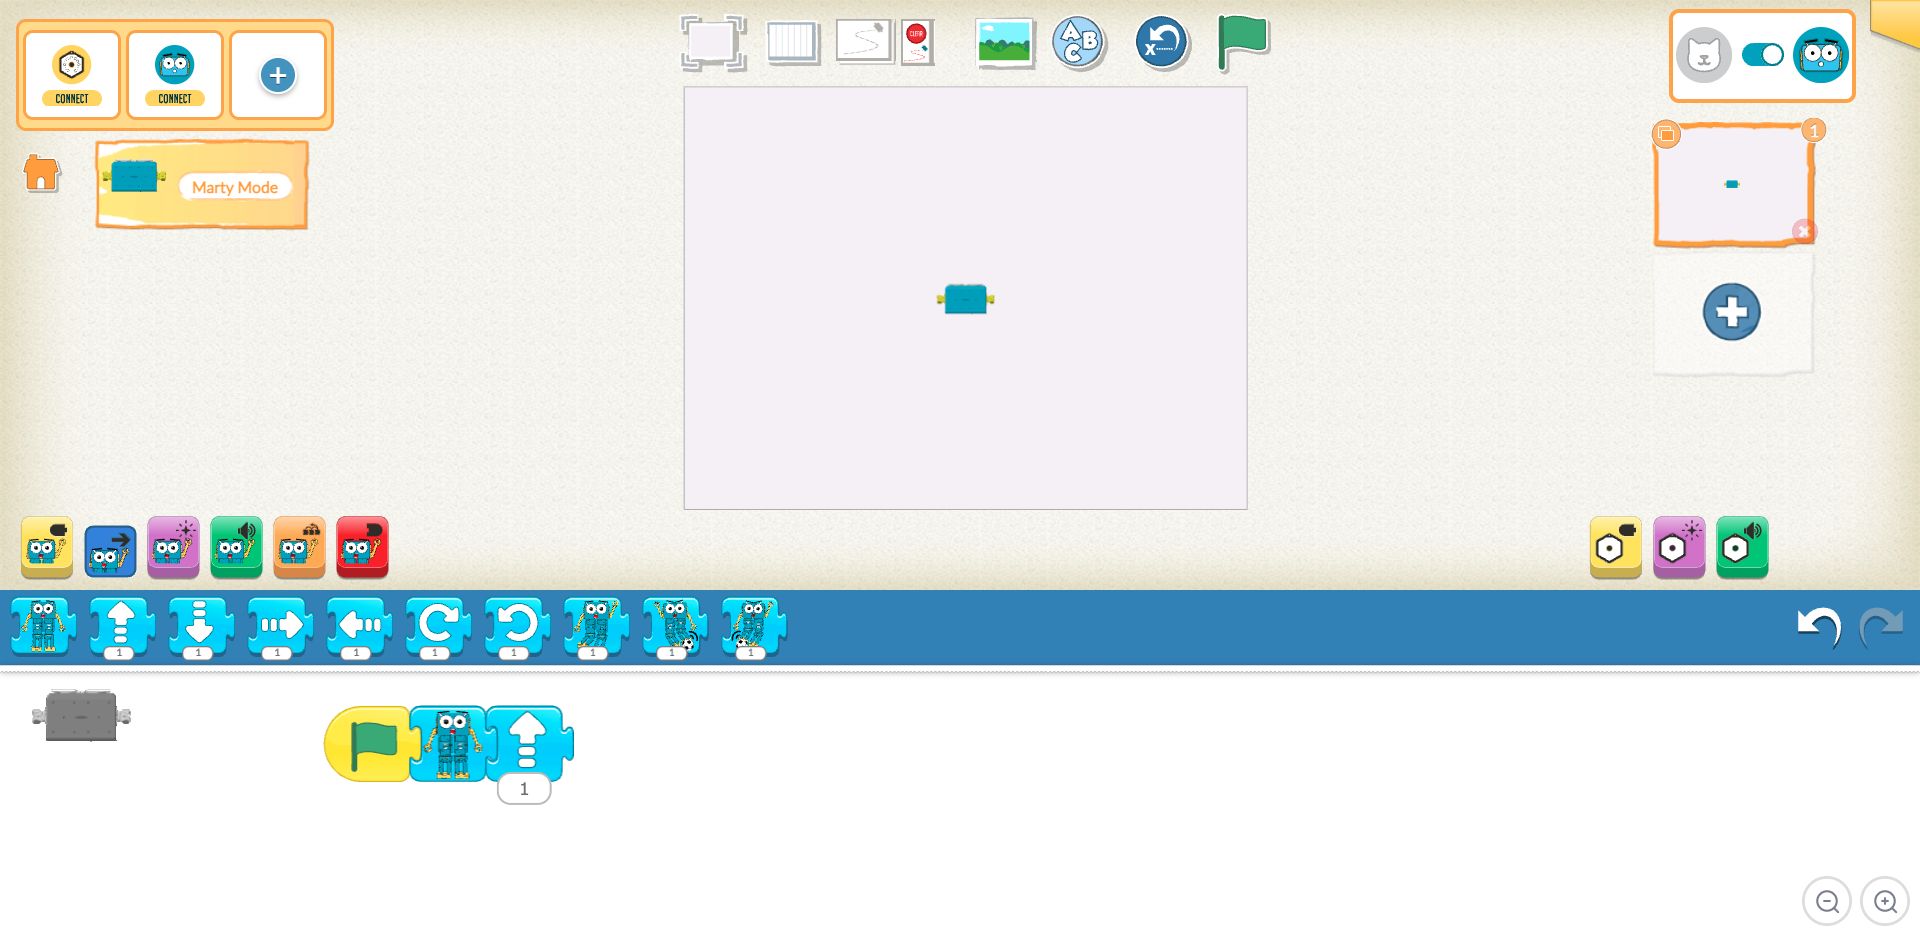
To connect a physical Marty:
- Turn on Marty and enable Bluetooth on your device.
- Select the Marty CONNECT button at the top left: it has Marty's blue face. The neighbouring yellow button is for Cog.
- Follow the connection prompt and choose your Marty. On the web, this uses the browser's Bluetooth device picker. Use a browser that supports Bluetooth connections, or use the Robotical mobile app.
- Check that Marty is connected, then use Marty mode to build and run robot programs.
The Cog categories on the right are for Cog. They are separate from the Marty categories and are not needed for a Marty-only program.
Find your way around the editor
- Home: the orange house on the left saves the project and returns to My Projects.
- Connection controls: the upper-left buttons connect Marty or Cog. The adjacent + opens the extension options.
- Stage: the large area in the upper middle displays your characters or the bird's-eye view of Marty.
- Stage tools: the controls above the stage include presentation mode, the coordinate grid, trace and clear trace, background or surface selection, text, reset, and the green flag. Reset returns the on-screen characters to their starting positions.
- Characters: in sprite mode, select a character on the left to work on its scripts. Use the + below the list to add another character.
- Pages: thumbnails on the right select the pages in your project. Use + to add a page, the copy button to duplicate one, or its delete button to remove it.
- Block categories: the coloured buttons select the type of block you want. The block palette below them shows the blocks in that category.
- Programming area: drag blocks from the palette into the large white area at the bottom and snap them together from left to right. Each connected sequence is a script.
- Block values: select a number or choice beneath a block to change its setting, such as the number of steps.
- Undo and redo: the curved arrows at the right of the block palette reverse or restore an edit.
- Script zoom: the magnifying-glass buttons at the bottom right change the size of the blocks in the programming area.
- Green flag and stop: the green flag runs scripts that start with a green-flag block. While a program is running, use the stop control to stop it.
Make your first Marty program
After connecting Marty, select Marty mode and build this short script:
- Select the yellow Triggering category and drag Start on Green Flag into the programming area.
- Select the blue Motion category and snap Get Ready after the green-flag block.
- Snap Move Forward after Get Ready. Leave its value at 1 for one step.
- Place Marty on a clear, level surface with room to move, then select the green flag above the stage.
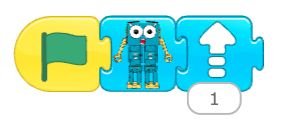
Get Ready prepares Marty for movement, then Move Forward asks Marty to take one step. The blocks must be snapped together for the script to run in that order.
Add characters and backgrounds
In sprite mode, select + beneath the character list to open the character library. Choose a character, then select the tick to add it. The paintbrush opens the paint editor, and the upload button lets you import a character image.
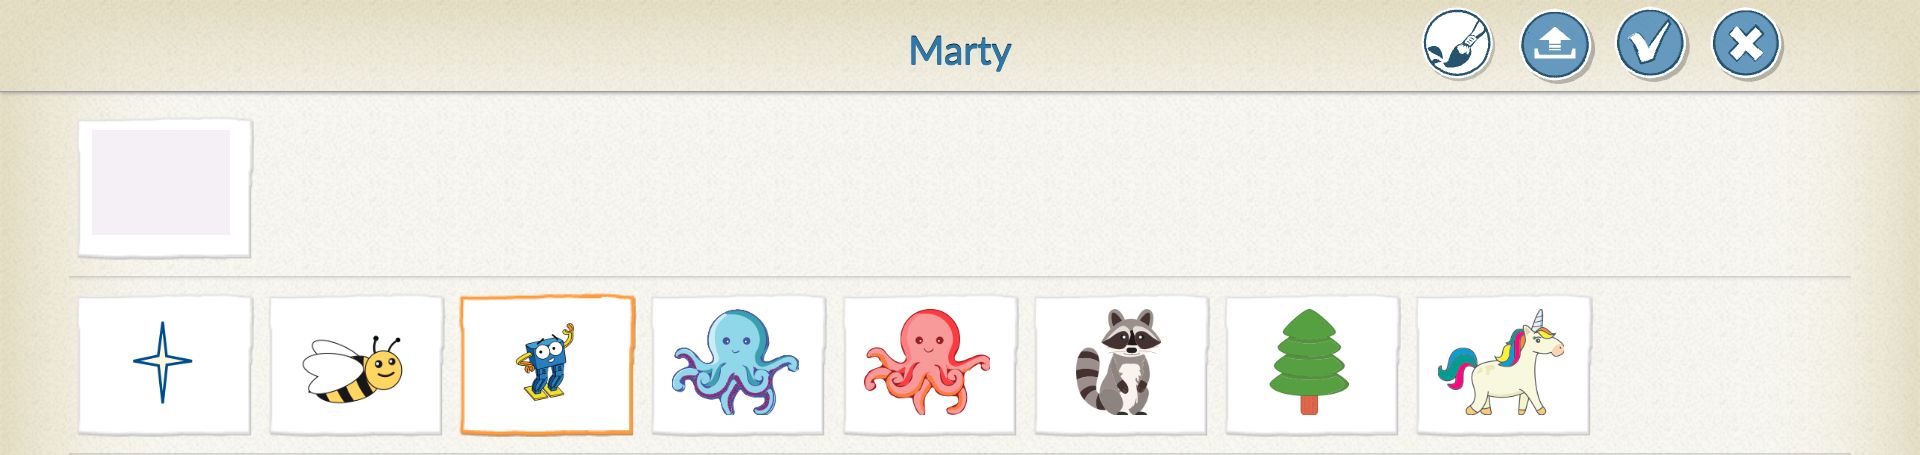
Use Change Background above the stage to choose a background for sprite mode. In Marty mode, the corresponding control is Change surface. Use Add Text to add a title or label to the stage.
Learn more about the blocks
The categories on the left use the following colours:
- Yellow – Triggering: start a script, such as when the green flag is selected.
- Blue – Motion: move a character in sprite mode or program Marty's movements in Marty mode.
- Purple – Looks: change a character's appearance or use Marty's expression and lighting blocks, depending on the mode.
- Green – Sound: add sounds.
- Orange – Control: control timing and repetition.
- Red – End: finish or repeat a script, or move to another page where supported.
For individual block descriptions, return to My Projects, select the book icon at the top right, then choose Blocks Guide. The same area also contains the Interface Guide, Paint Editor Guide and Tutorials.
Visit Robotical's Learning Platform for guided Blocks Jr activities and classroom resources.
These screenshots show the current Robotical web app. The controls may be arranged differently on smaller screens.