Among other superpowers, adding a Raspberry Pi to Marty gives Marty the ability to operate completely autonomously, without being connected to a computer or phone.
This guide explains how to add a Raspberry Pi to Marty V2 and get even more out of both. It assumes that you already know how to work with Raspberry Pi alone: you should be comfortable using the terminal and performing advanced configuration on the Pi.
Adding a Raspberry Pi allows you to run Python programs on the Pi to control Marty, with all the functionality normally found in our Python library). The benefit is that there will be lower latency and the code will run fully on Marty, making your robot completely autonomous. Additionally, you can make automatic programs that run whenever you turn on Marty, which ties in with the huge amount of pre-existing material that uses Python on the Pi, for example voice or image processing.
Prerequisites
If you have never worked with Raspberry Pi before, we highly recommend you follow some of the getting started guides available from raspberrypi.org. Additionally, the Raspberry Pi documentation will prove very useful: the documentation has guides on Linux, the terminal, Python, and much more. If you don't know where to begin, you can always have a look at our Raspberry Pi Primer.
To follow this guide, you will need to:
- Have a supported model of Raspberry Pi (we support all models except Pi 4, Pi Pico and Compute Modules) with the official OS - Raspberry Pi OS, previously called Raspbian;
- Be able to power your Pi
- Know how to use the Linux Terminal on your Pi;
- Have a Marty V2 with a Raspberry Pi cable;
- Know how to control Marty from Python.
If you (or your students) are accustomed to using a Raspberry Pi with an external mouse, keyboard and monitor, and are not very comfortable using the Terminal/SSH (Secure Shell), we recommend consulting [how to set up VNC Virtual Network Computing. Connecting all the peripherals to the Pi will both limit Marty's movement and consume more electric current, which is already scarce: Marty can provide up to 1A and the Pi will need most of it for itself. VNC gives you the benefit of a physical monitor and a worthwhile graphical interface that works over WiFi: no need for cables.
Mounting the Pi
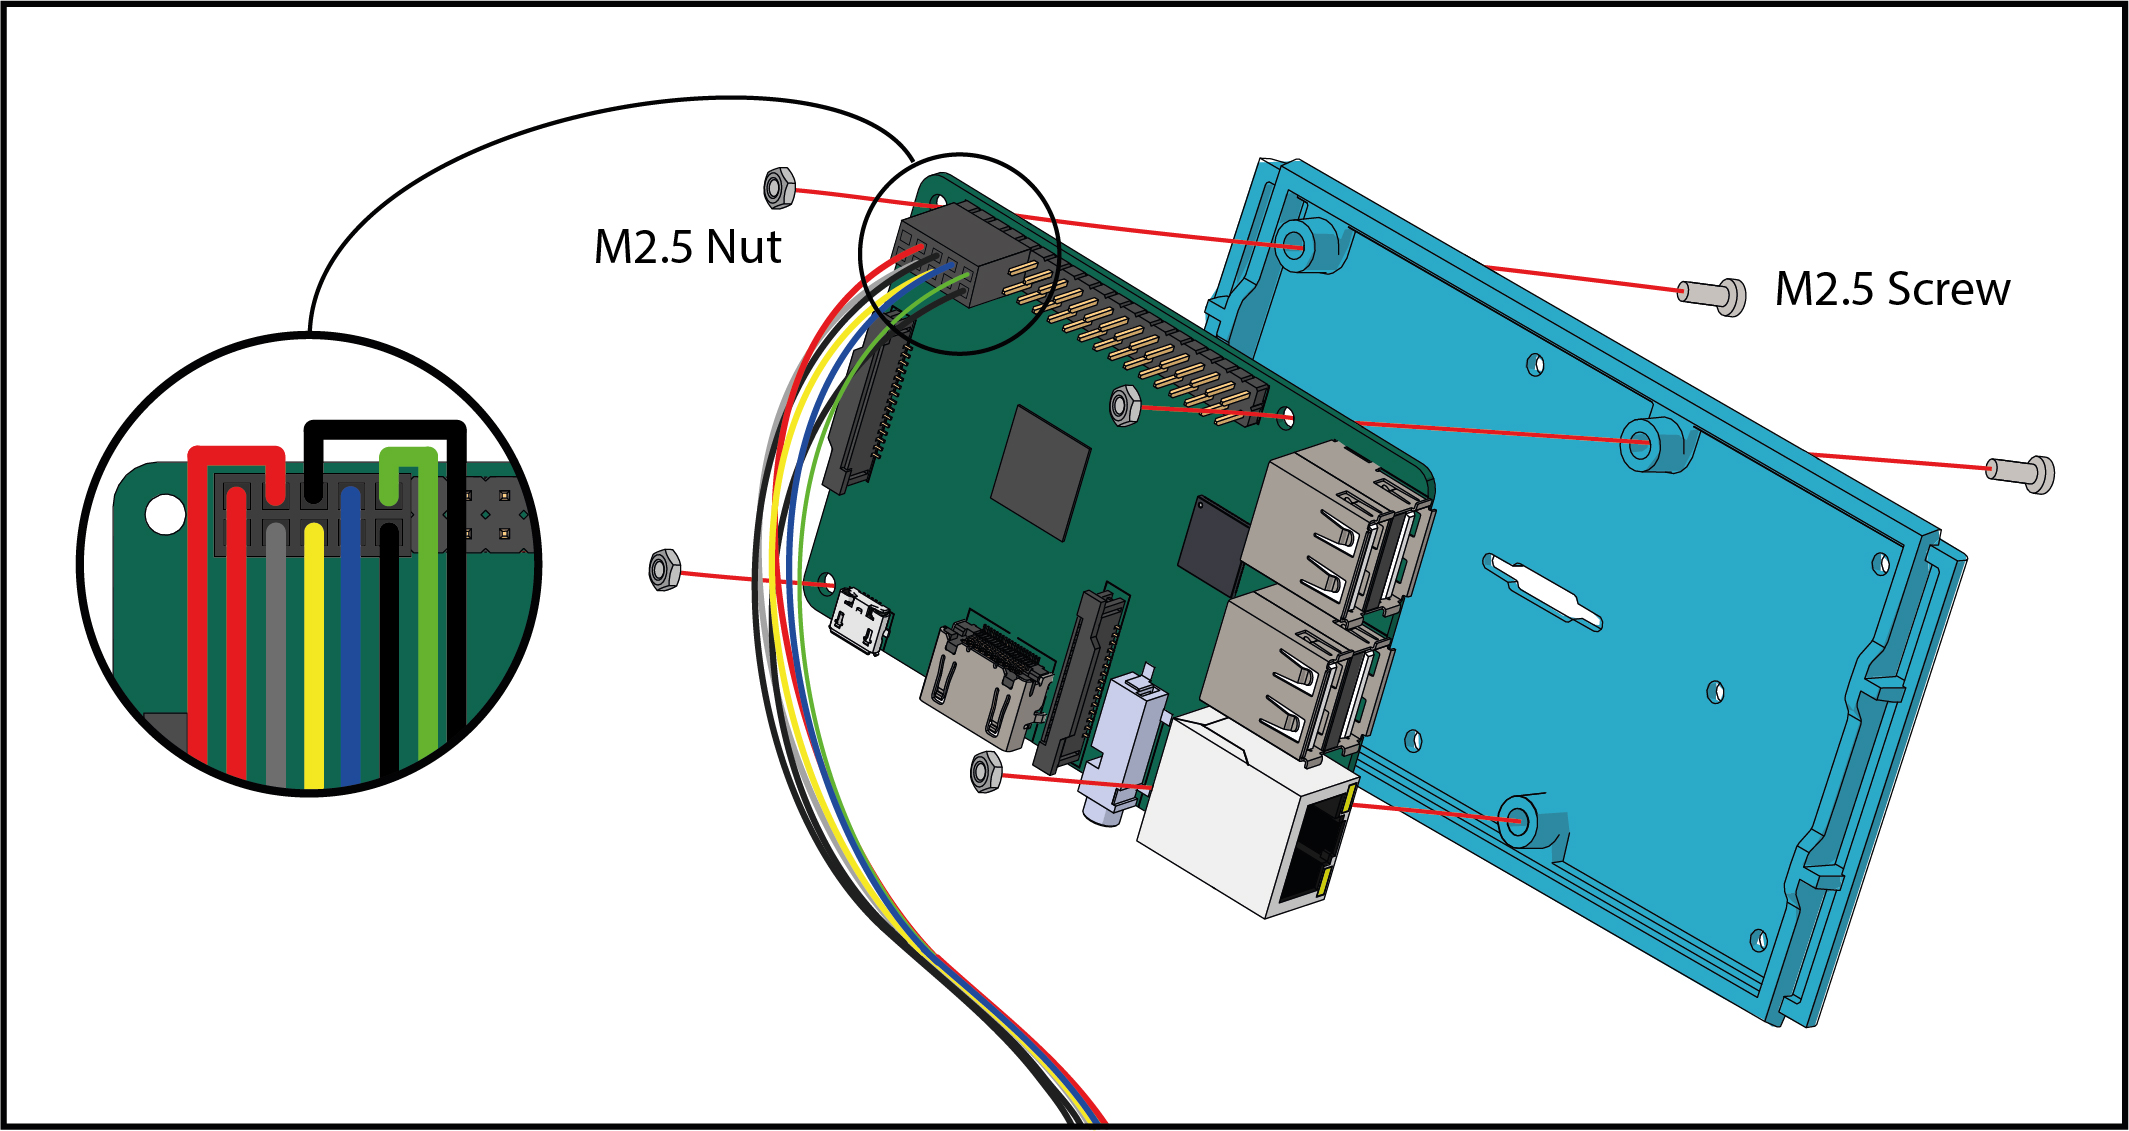
There are 4 standoffs on the inner side of the top lid of Marty's head. These are positioned to match the mounting holes on your Pi so you can easily attach it with 2, 3 or 4 _M2.5_ screws (with a thread length of 12mm). If you are only using 2 screws, it is best to secure them on two diagonally opposite corners of the Pi rather than two adjacent corners.
Connecting the Pi to RIC
You will need the Raspberry Pi connector cable and a way to power your Pi.
Take the Raspberry Pi cable and connect the end with the smaller, white connector to the port inside Marty's head marked _EXTENSION_. There is only one way this will fit.
The connector will look like one of these two:
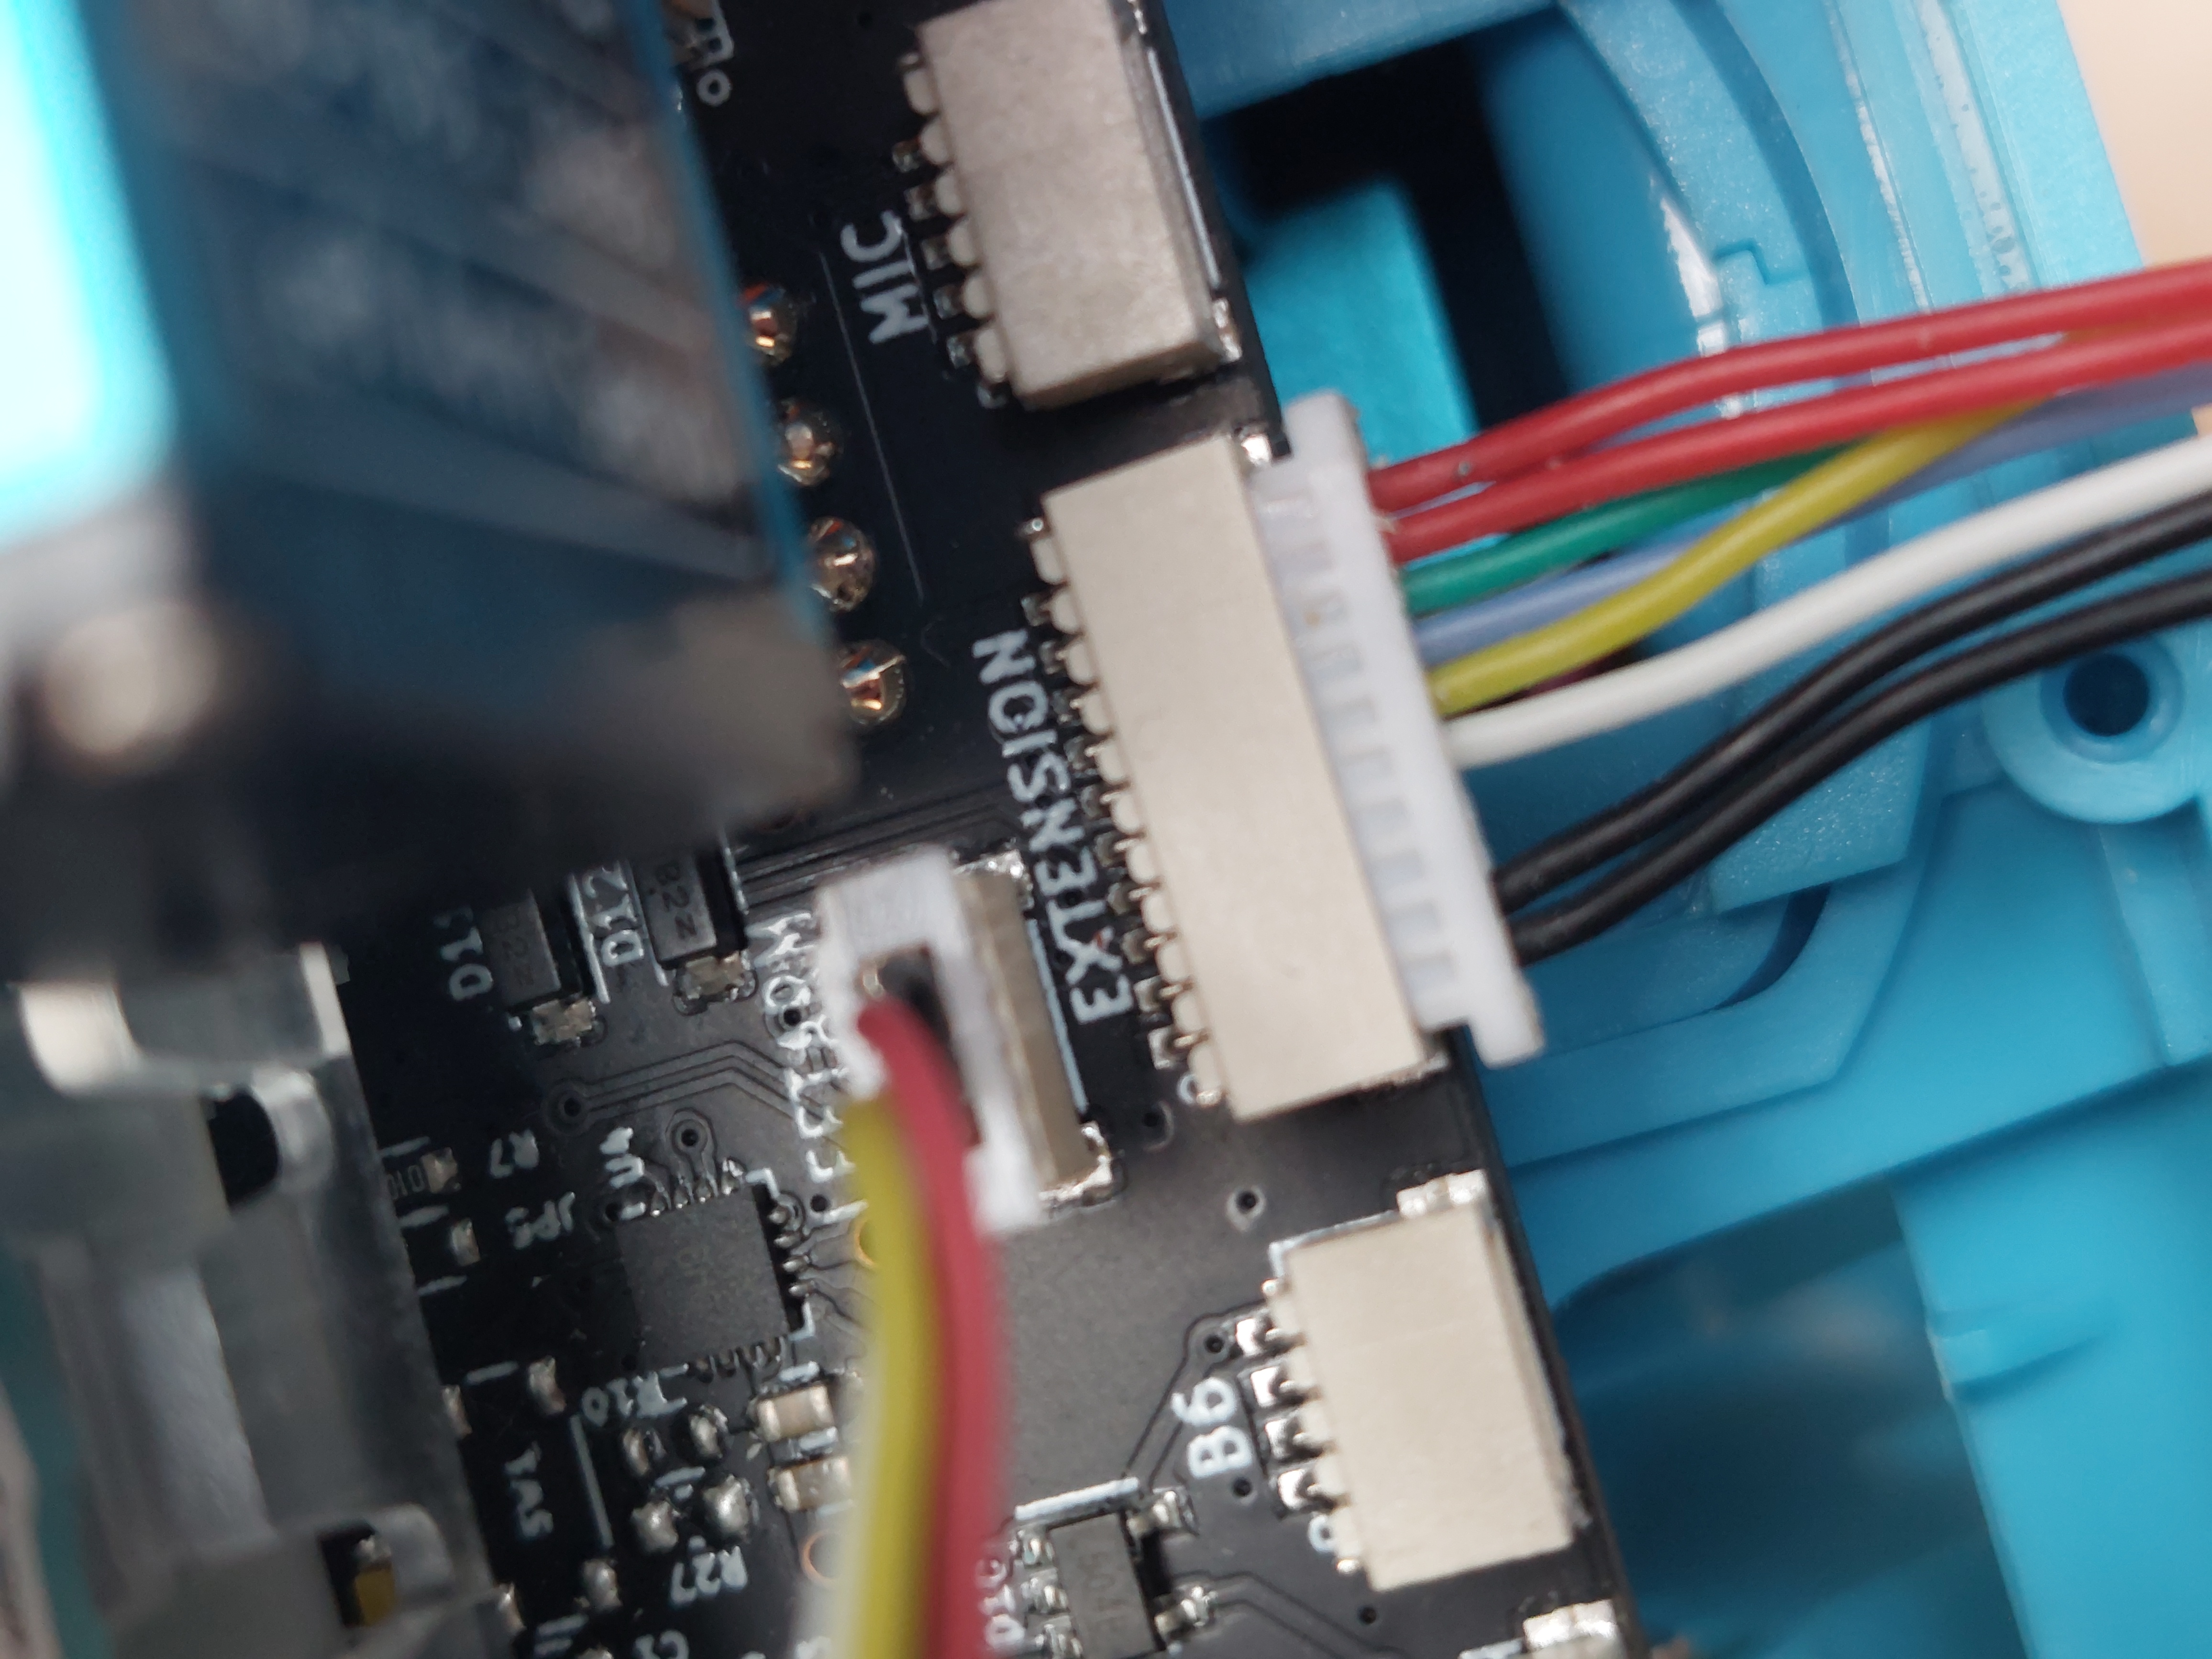
Older Martys will have this style of connector
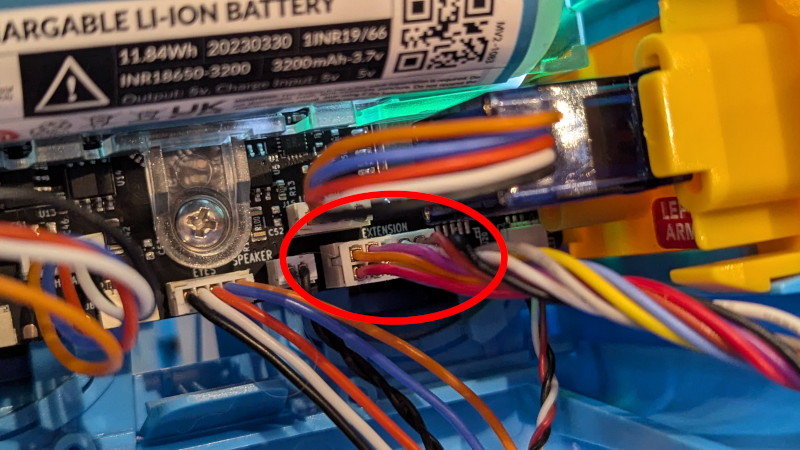
Newer Martys will have have this connector
The larger end of your Raspberry Pi cable connects to the side of the Pi's GPIO (General Purpose Input/Output) header, which is closer to the microSD card slot. If your Raspberry Pi cable consists of differently coloured wires, you can locate the red ones and align them with the 5V pins (use a pinout diagram to find the 5V pins). Alternatively, you can locate the corner of the connector that does not have a wire connected to it and align this with pin 1 (3V3 Power) on the Pi.
CAUTION: Make sure Marty is OFF before connecting the Raspberry Pi end of the cable and triple check that the cable has been plugged in the right way around before turning Marty on. Incorrect connection may seriously damage the Pi and/or Marty.
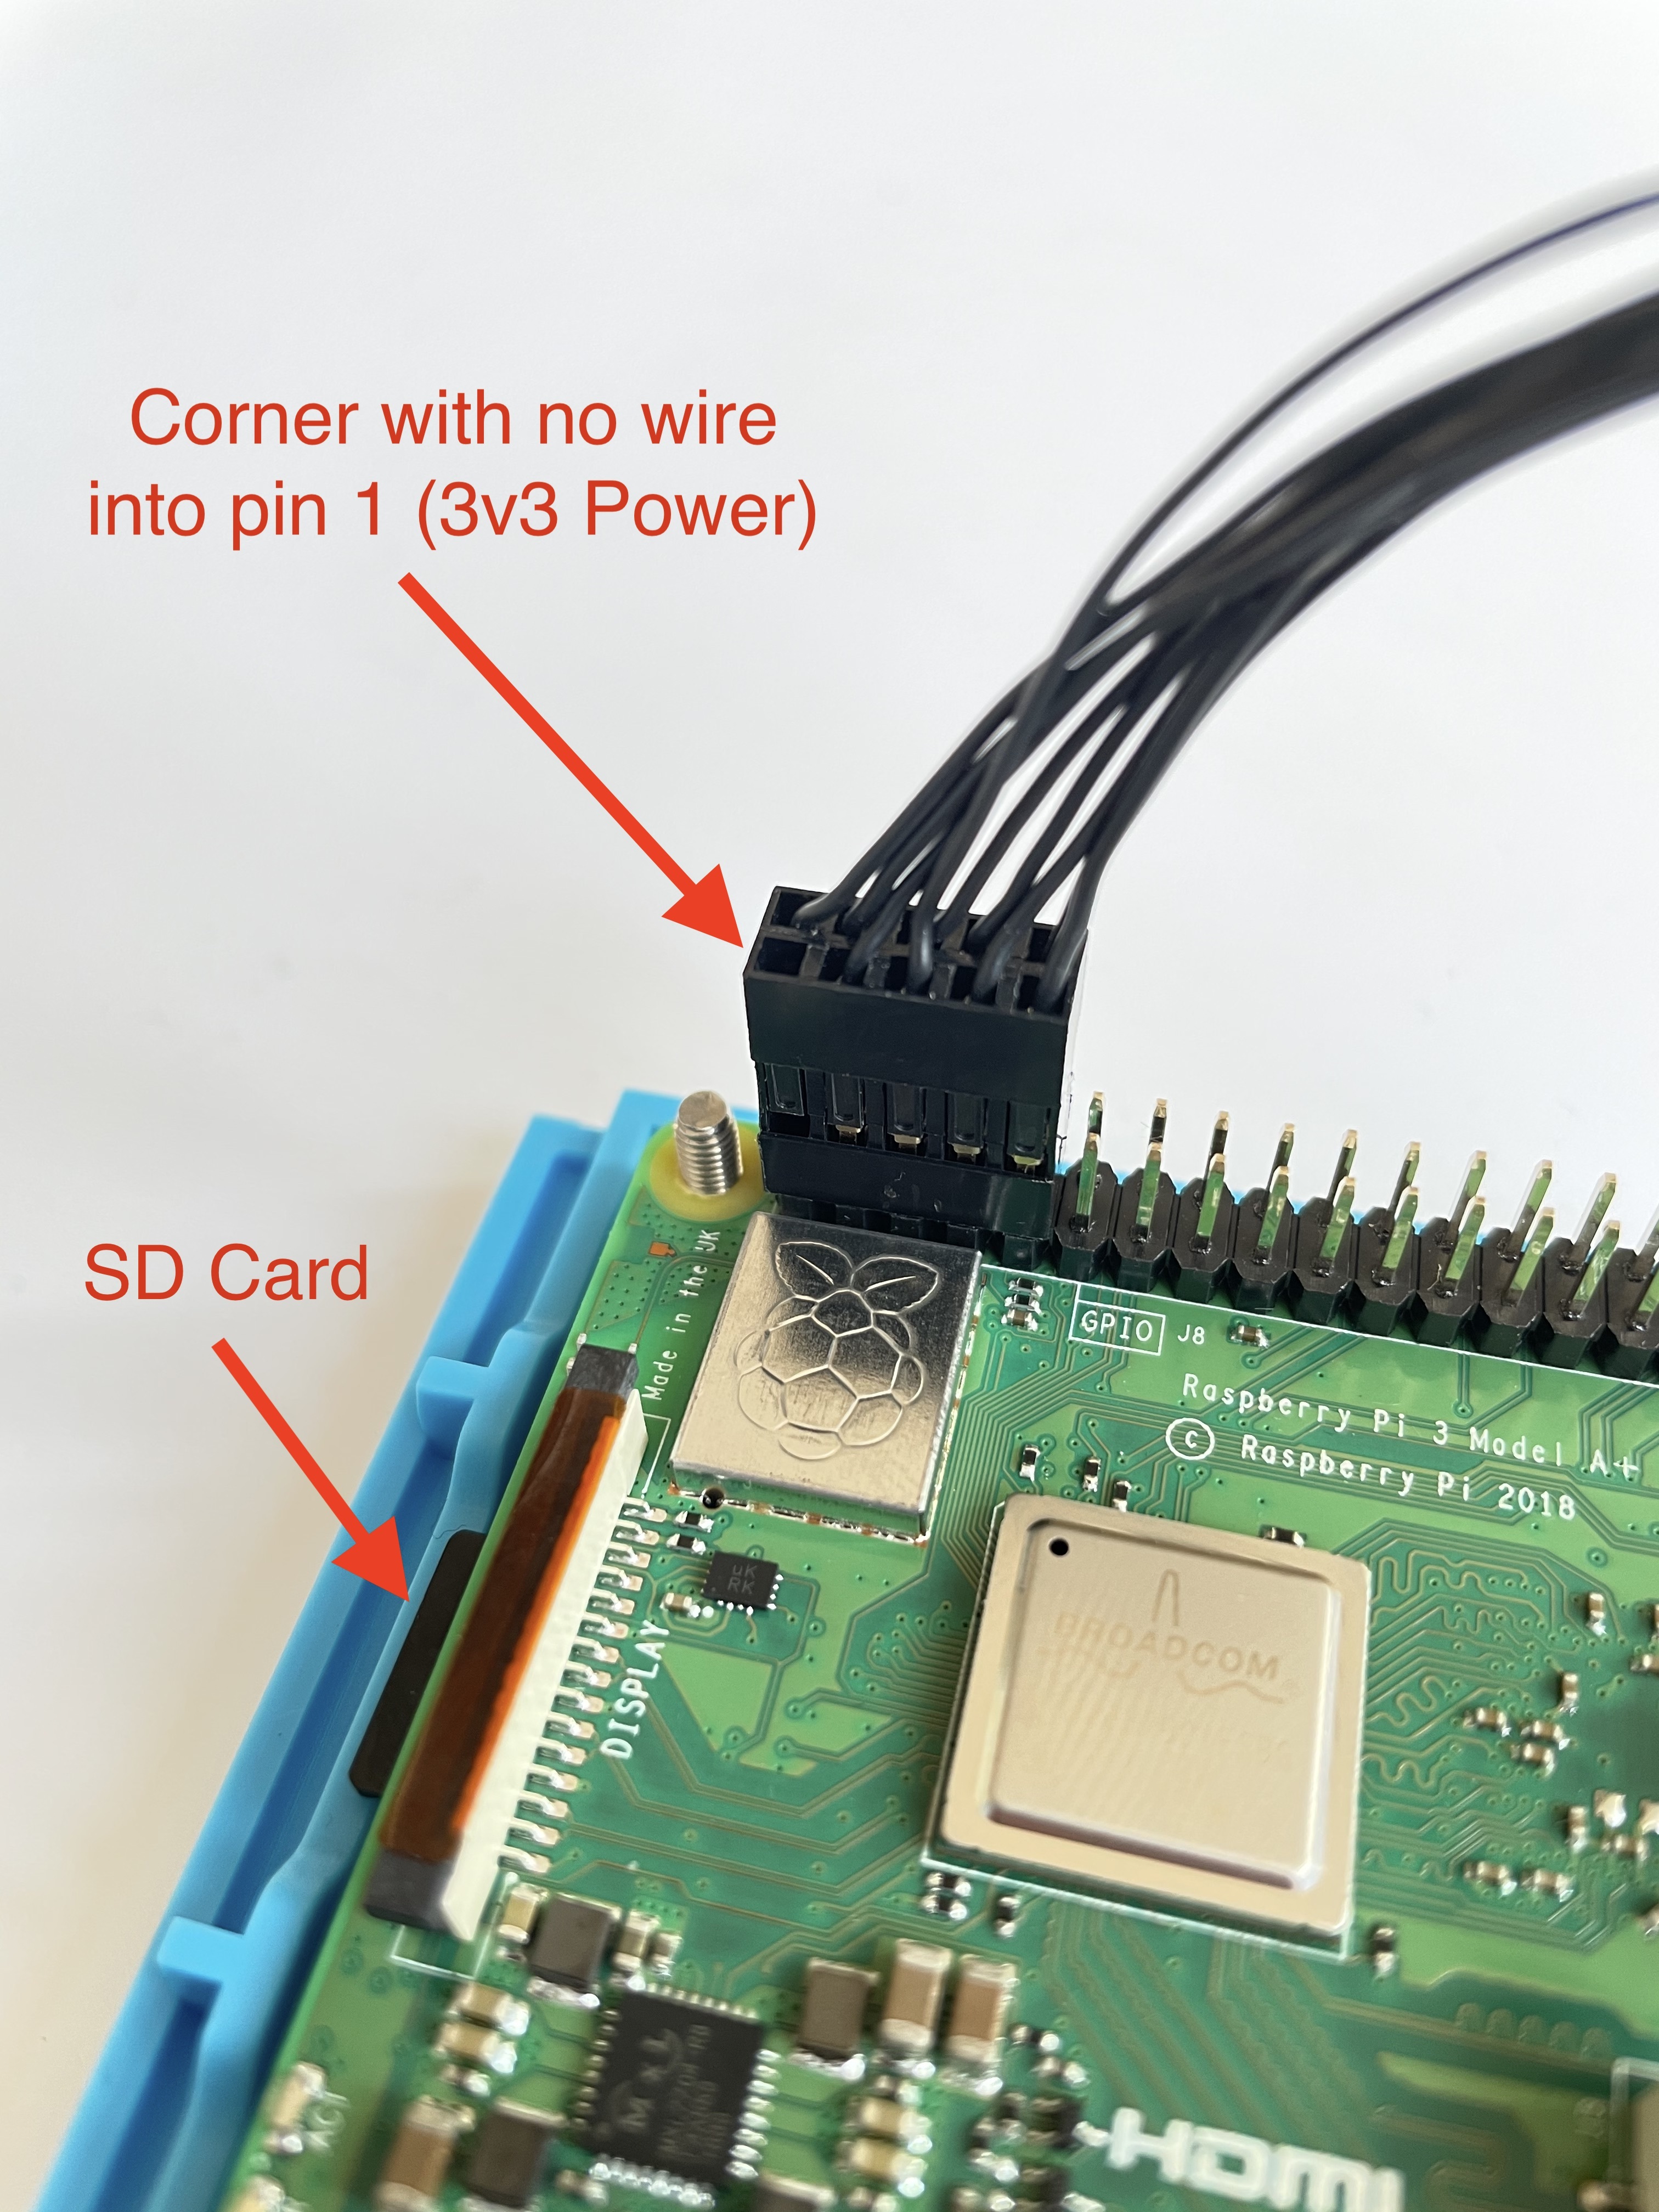
If you have a more recent cable it will have a blanked off pin. This will help you orient the connector as that end must overhang the Pi header connectors

Raspberry Pi Configuration
RIC and the Raspberry Pi communicate using UART (Universal Asynchronous Receiver-Transmitter). Unfortunately, if your Pi has Bluetooth (Pi 3 and Pi Zero W), it probably uses UART for that, so Bluetooth will need to be disabled. To disable it, follow these steps:
- In terminal, type sudoedit /boot/config.txt.
- Add a new line to the end of the file and type dtoverlay=disable-bt.
- Save the file and exit the editor.
- From terminal, run sudo systemctl disable hciuart.service.
- Reboot the Pi: type sudo reboot.
Finally, make sure the Serial (UART) Interface on your Pi is configured correctly:
- From terminal, run sudo raspi-config.
- Select “3 Interface Options”.
- Then, select “P6 Serial Port”.
- When asked “Would you like a login shell to be accessible over serial?”, select < No >.
- When asked “Would you like the serial port hardware to be enabled?”, select < Yes >.
- If you are asked to reboot, accept.
Optional: Have a look here for more information about UART including how to configure miniUART to use Bluetooth on the Pi while it is connected to Marty.
Raspberry Pi software
You will need Python (3.6 or newer), pip, and MartyPy installed on your Raspberry Pi. See Setting Up Python On Your Computer for details on how to set it up.
Check that it worked
Now you should be able to control Marty, in Python, on your Raspberry Pi. This works the same as any other way of controlling Marty with just a small difference in how you connect to Marty. Instead of something like my_marty = Marty("wifi", "192.168.0.42"), you will need this:
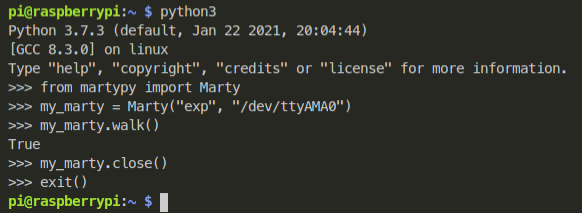
my_marty = Marty("exp", "/dev/ttyAMA0")
(In the command above, "exp" is the connection method and "/dev/ttyAMA0" is a special file that should be present on your Pi, if UART is configured correctly (as per section 3). Unlike the IP address with the "wifi" connection method, the "/dev/ttyAMA0" file name should always be the same.)
Click First Steps With Python to see examples of code for Marty. The following code will make Marty walk two steps forward:
from martypy import Marty

my_marty = Marty("exp", "/dev/ttyAMA0")
my_marty.walk()

my_marty.close()
In terminal, the above code will look like this:
What's next?
Check out our Raspberry Pi + Marty lesson for a clear demonstration of the difference adding a Pi makes to Marty.
Feeling creative? We challenge you to incorporate Marty into one of these awesome Raspberry Pi Python projects!