NOTE - You need firmware v0.0.124 or above for this add-on to function. Please use the app to check for updates available.
Unless your Marty was provided with the following components preinstalled, you will need to purchase the following add-ons from our shop. To set up your Marty with Disco functionality, you will need:
- Two Disco Foot add-ons
- Two Disco Arm add-ons
- Two Disco Eye add-ons
- Four screws
- Four nuts
- A screwdriver
- A Marty
If you have fewer disco Marty boards, don't worry - you don't need a full set. Marty will work with as many as you connect!
Attaching the Disco Add-ons
Open the back of Marty's head, take off the top plate and open the face.
Disco Eyes
You will need to unscrew both the left and right eye from the face plate. If you have placed eye colour stickers on your Marty, you will need to remove these to access the screws. Don't worry, if you peel these carefully, they will stick back on when you are done!
Remove the backing from the adhesive strips on the Marty LED Eyes
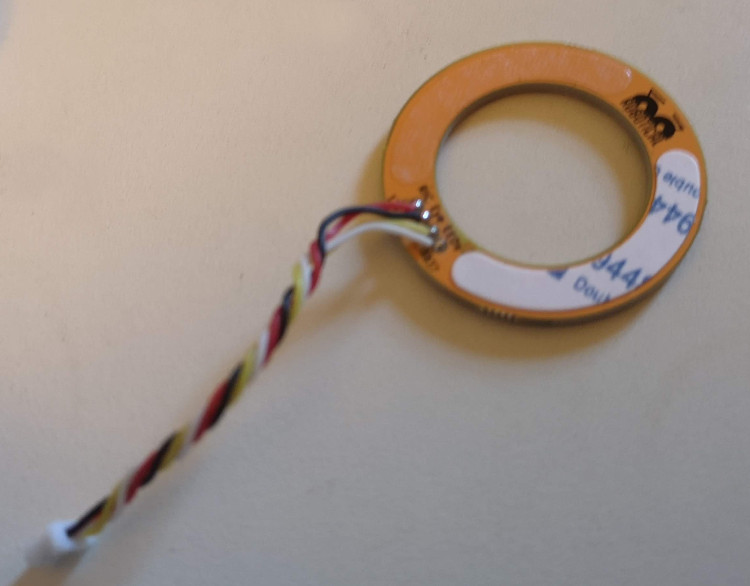
For each eye, feed the cable from the Disco Eye add-on through the curved holes that the eye will cover, and stick each Disco Eye add-on to the face, being careful to make sure the eyes are centered around the holes.
Next, screw each eye back onto the head.
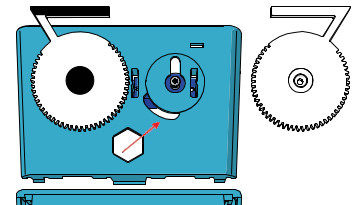
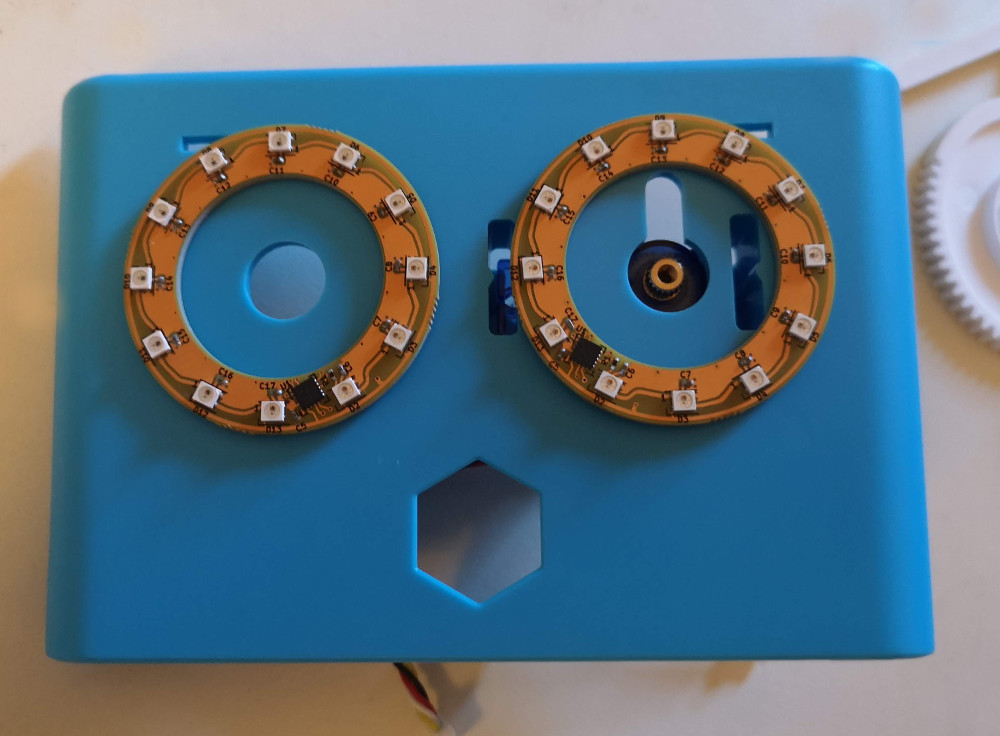
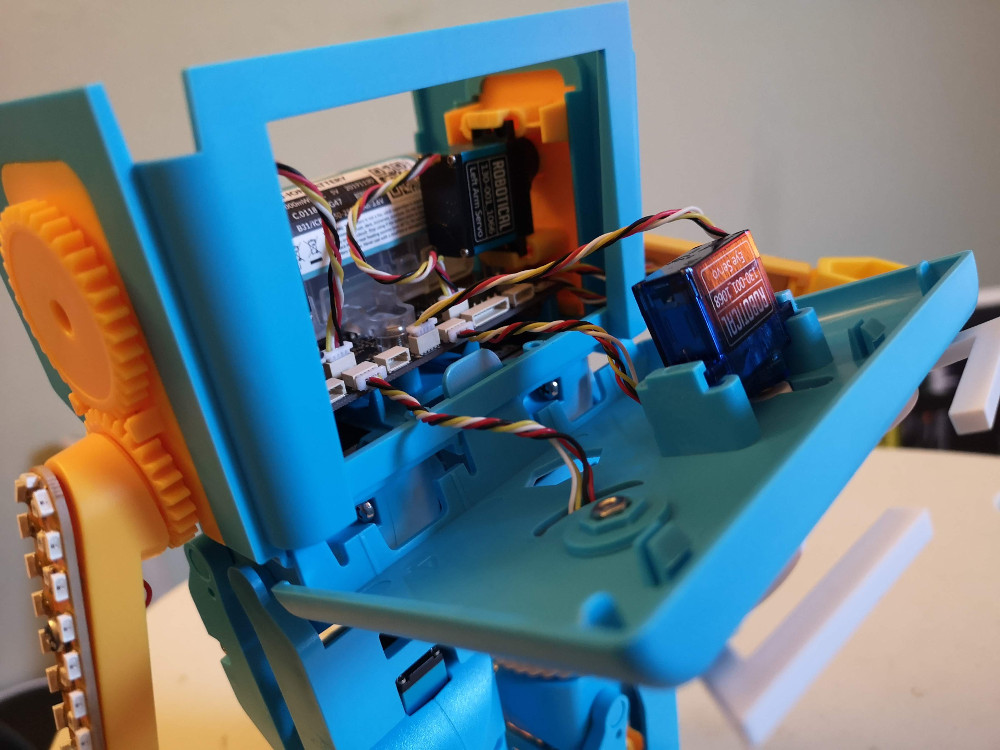
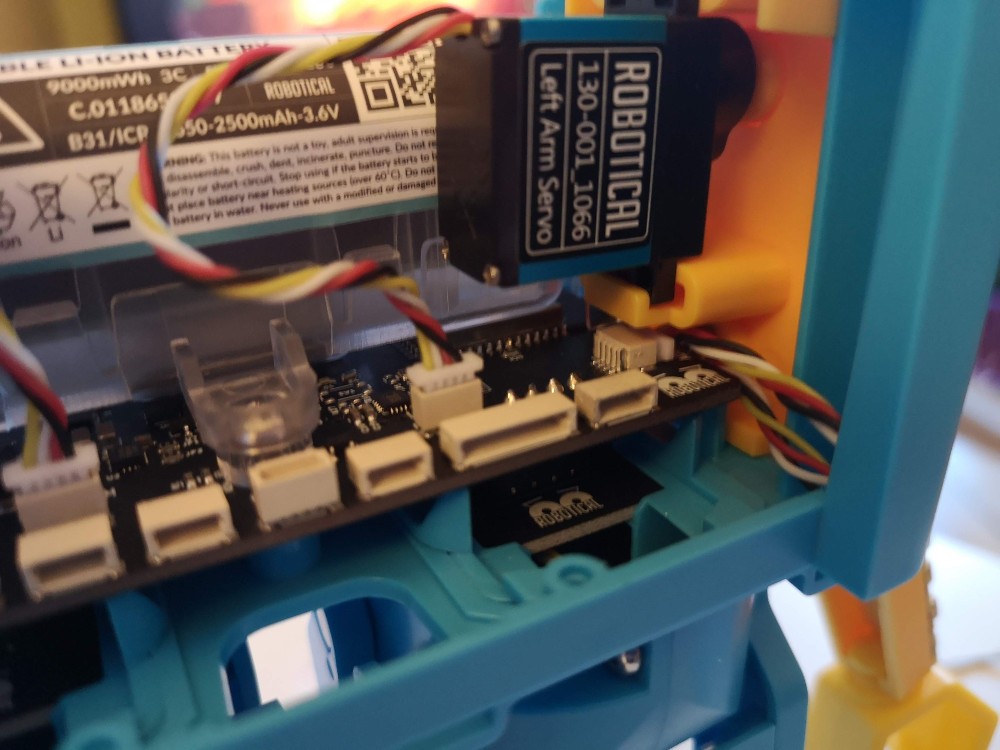
Now look for two spare I2C ports on the front of the RIC board (shown below) and plug in the two Disco Eye cables, that you fed through the curved holes . You can use ports B4 and B5, but do not close the face just yet!
Disco Arms
Remove each arm from the head by squeezing together the two clips inside the head at the top of the arm. Position the Disco Arm add-on so that the curved side points to the shoulder and the flat side points to the hand.
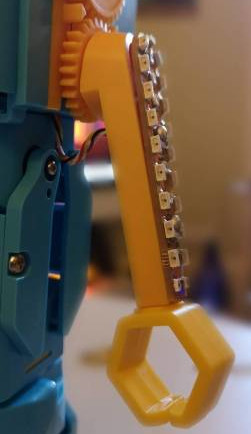
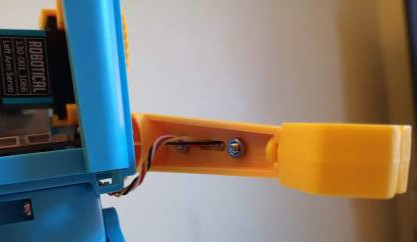
Once aligned, feed the cable through the long, thin hole on the arm and use two screws and nuts to secure the add-on to the arm.
Once the add-on is attached to the arm, feed the cable through the hole underneath the head, next to the hip and plug the cable into a spare I2C port, such as B6 and B3.
Once all 4 boards are plugged in, two eyes and two arms, clip the Marty arms back into the body, clip the face plate back onto the head and replace the top plate.
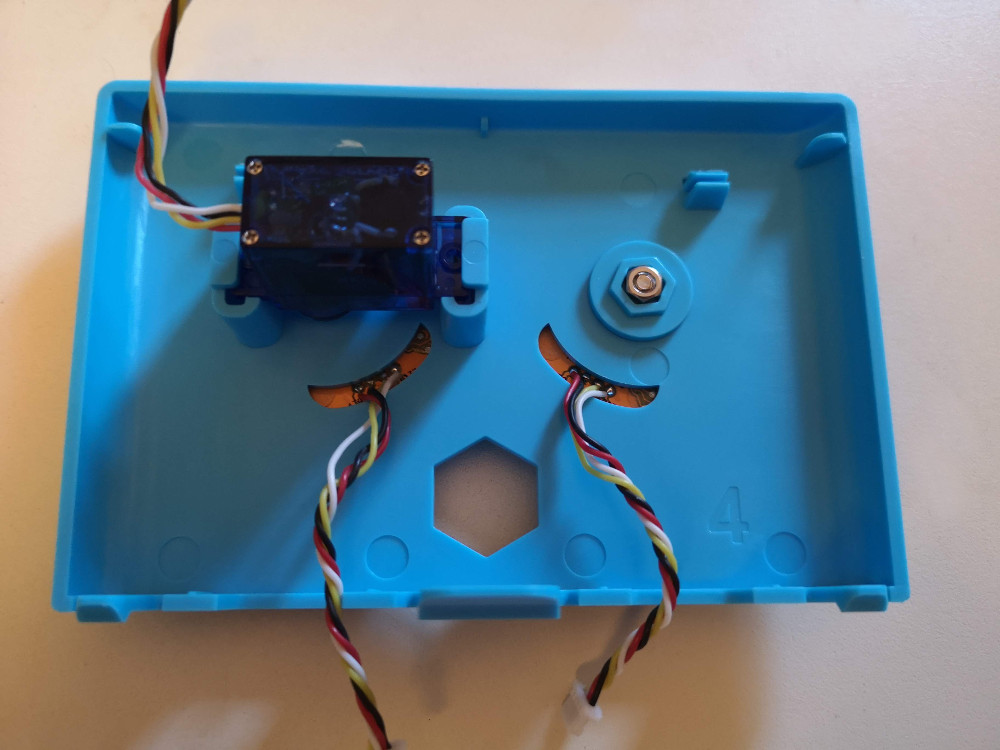
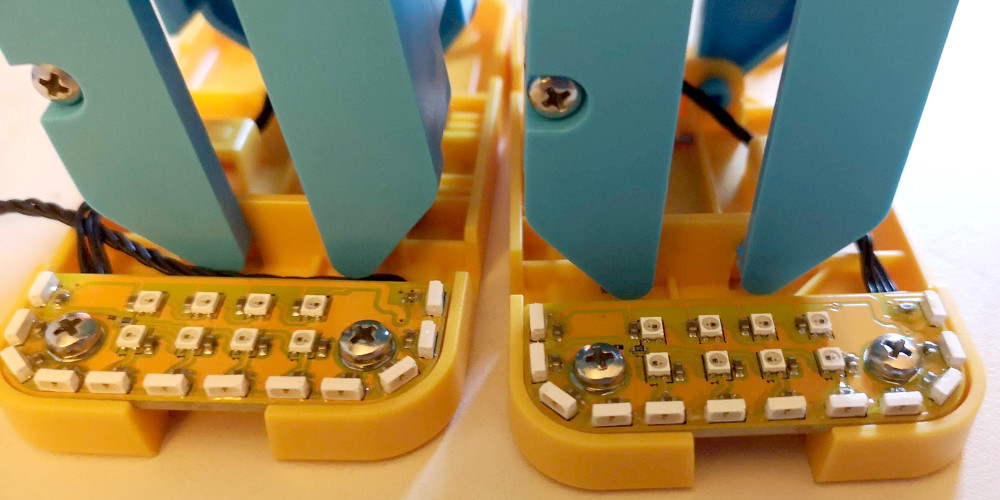
Disco Feet
If you already have sensors attached to Marty's feet, you will need to unscrew these first. Remember that Marty has space on the front and the back of the foot for add-ons, so place the Disco Foot add-on in whichever space you like.
Screw the Disco Foot add-on and plug in the black cable. Make sure the black cable is plugged in securely, and the screws are tight. Remember that we want the LEDs to point upwards; the LEDs look like tiny white rectangles on the add-ons.
Configuring the Disco Add-ons
When you are connected to your Marty from the Marty the Robot v2 app, select Configure then Add-ons to get to the Add-on configuration screen.

When selected, a Disco add-on will flash on the robot, and the Add-on Manager will display the add-on's type, its serial number and a text box where you can enter a new name for your add-on. Following this, press 'Update Name' to save your changes.
Now that your Disco add-ons are named. Click into Marty Blocks to start programming them!
Troubleshooting
If one or more of your add-ons isn't displayed on the Add-on Manager, try the following:
- Restart the Robot and App.
- Check that the missing add-on is plugged in correctly to its I2C port.
- Try plugging the missing add-on into a different I2C port.
Marty Blocks
The blocks to control the Disco Marty add-ons can be found under the 'Looks' section in Marty Blocks.
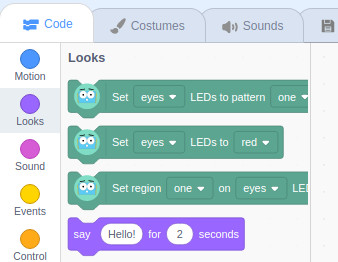
These three scatch blocks allow you to set both matching add-ons together - both eyes, both arms, both feet - or you can set all Disco add-ons at once.
The three blocks are:
- Set < type > LEDs to pattern < type >
- Set < type > LEDs to < colour >
- Set region < code > on < type > LEDs to < color >
Pattern
This block allows you to set the add-ons to one of two pre-set Disco patterns.
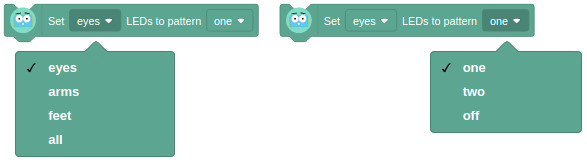
First, select an add-on type from the dropdown list:
- Eyes - sets both eyes
- Arms - sets both arms
- Feet - sets both feet
- All - sets both eyes, both arms and both feet
Second, select a pattern:
- One
- Two
- Off - sets the LEDs off
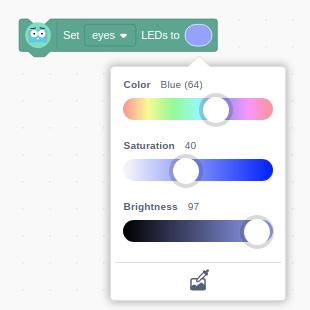
Single Colour
This block allows you to set the add-ons to a colour of your choice.
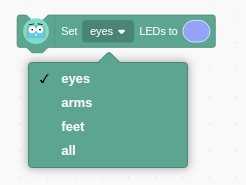
First, select an add-on type from the dropdown list:
- Eyes - sets the colour on both eyes
- Arms - sets the colour on both arms
- Feet - sets the colour on both feet
- All - sets the colour on both eyes, both arms and both feet
Second, select a colour using the colour picker wheel:
- Colour - This is the base colour your are choosing
- Saturation - This is the intensity of the colour, the vividness from grey to brig
- Brightness - This is relative lightness or darkness of the colour
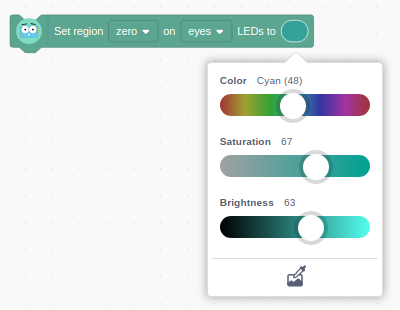
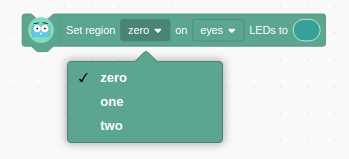
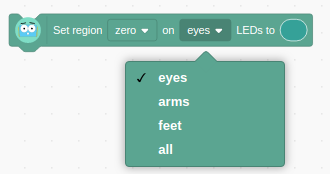
Region
The Disco add-ons each have three regions which can be set to a colour individually from each other.
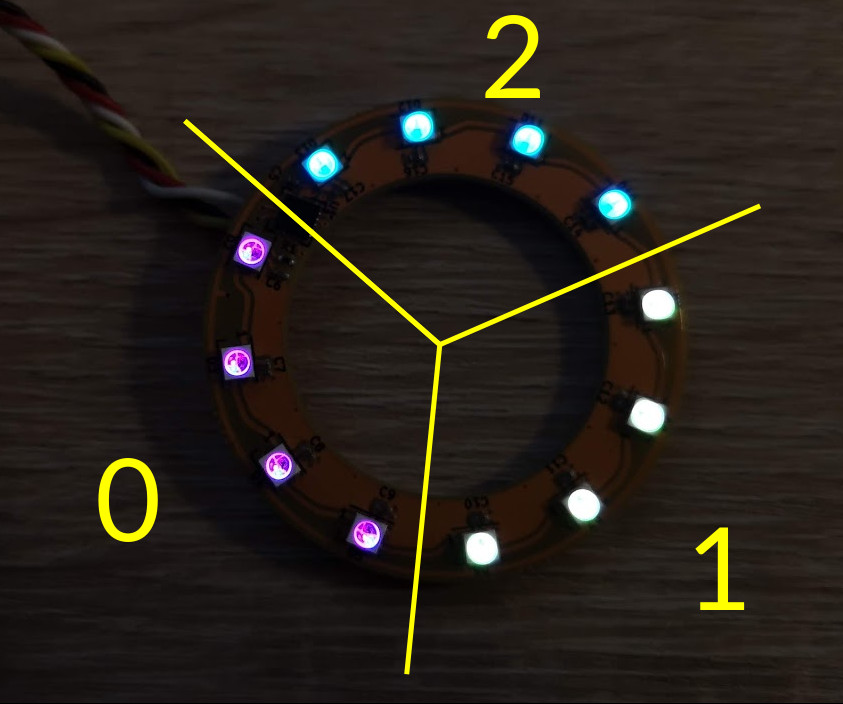
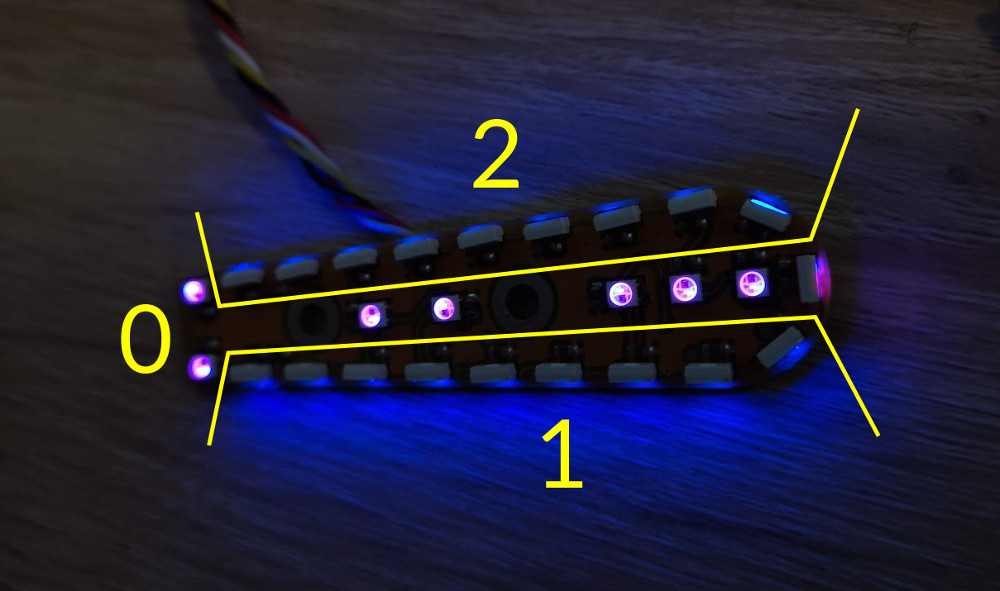
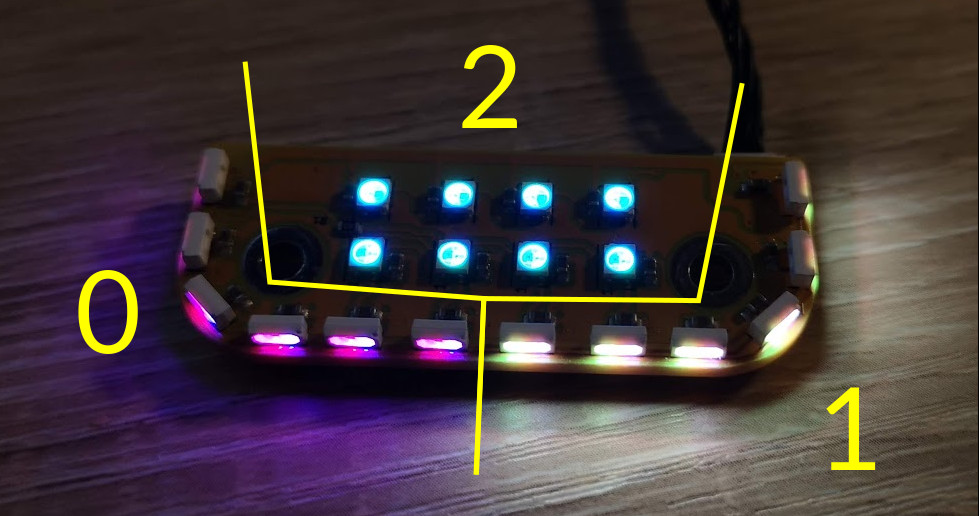
This block allows you to select a region on a selected add-ons to any colour, using the colour picker.
First, select a region from the dropdown list:
- Zero
- One
- Two
Second, select an add-on type from the dropdown list:
- Eyes - sets the region on both eyes
- Arms - sets the region on both arms
- Feet - sets the region on both feet
- All - sets the region on both eyes, both arms and both feet
Third, select a colour using the colour picker wheel:
- Colour - This is the base colour your are choosing
- Saturation - This is the intensity of the colour, the vividness from grey to brig
- Brightness - This is relative lightness or darkness of the colour